

Leaks & Service Repairs

757-399-3066 ext 3 (Leaks & Service Repairs)

Reroof Estimates & Inspections

757-399-3066 ext 1 (Reroof Estimates & Inspections)

Category: Roofing Repairs

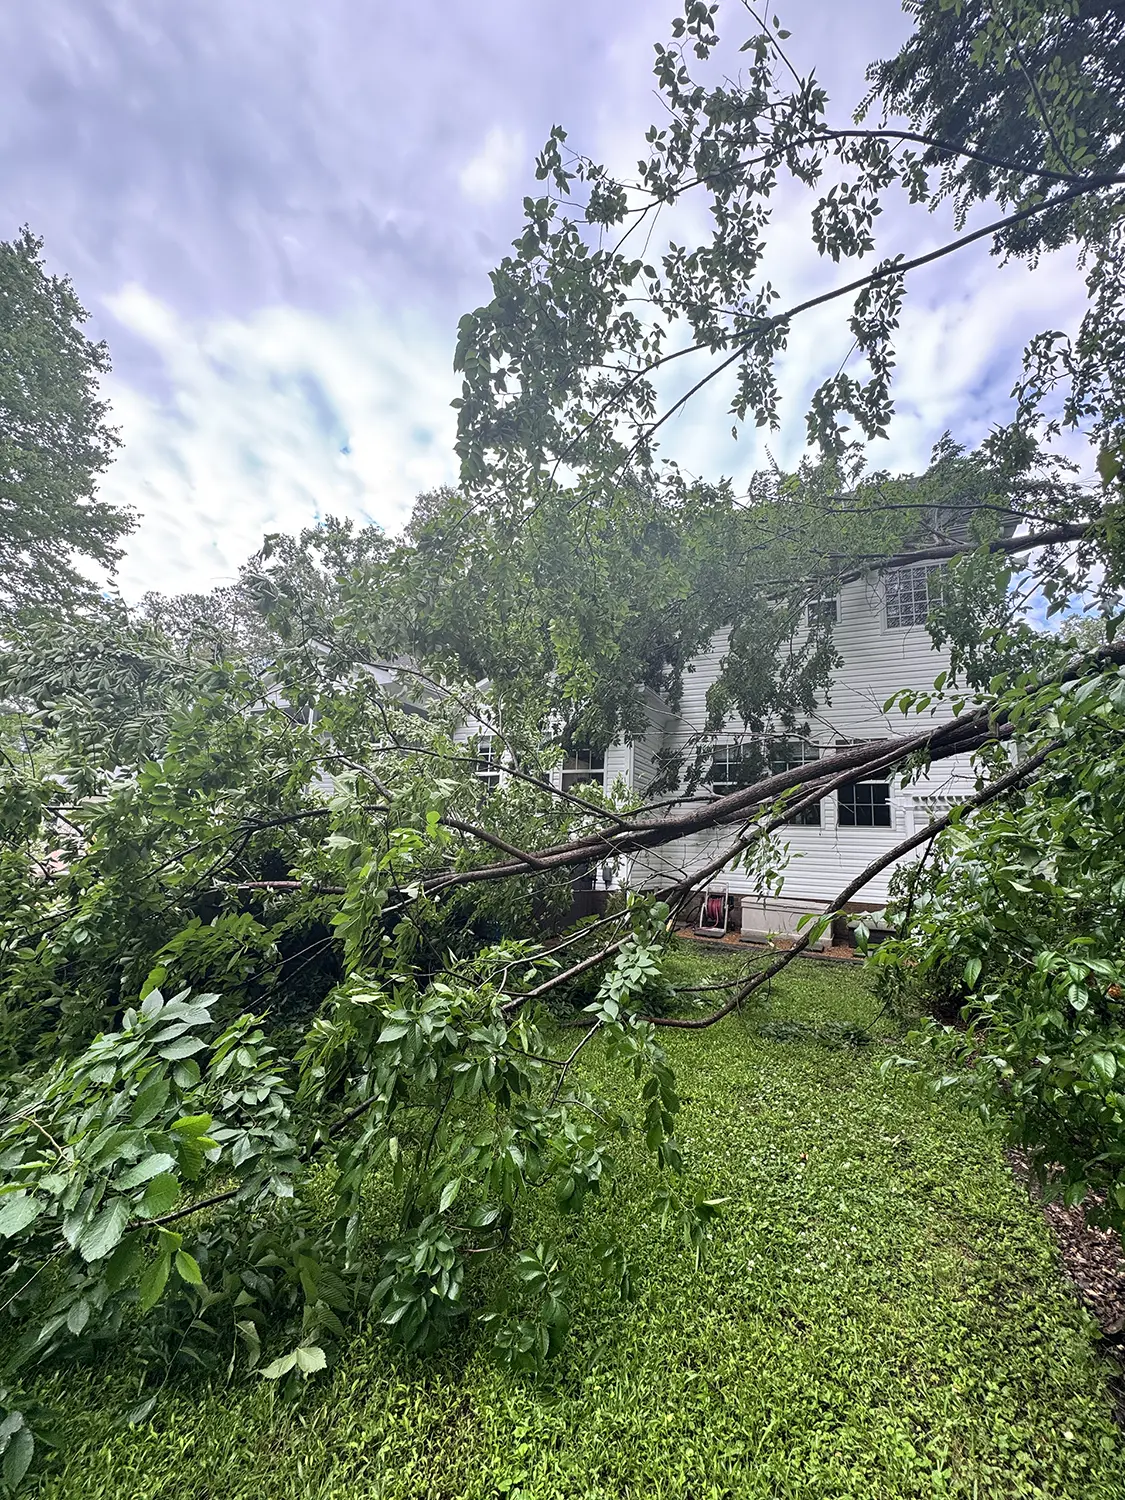
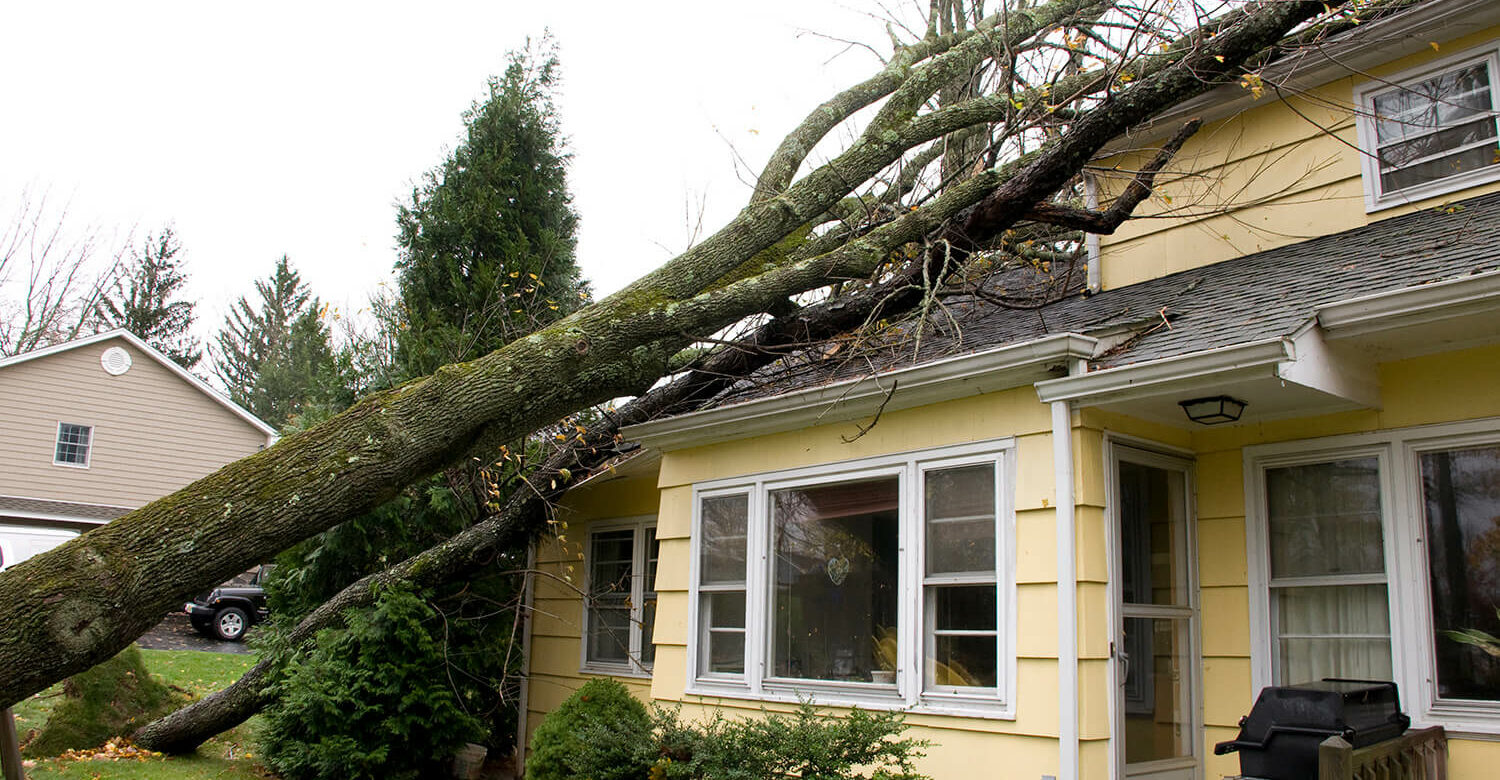
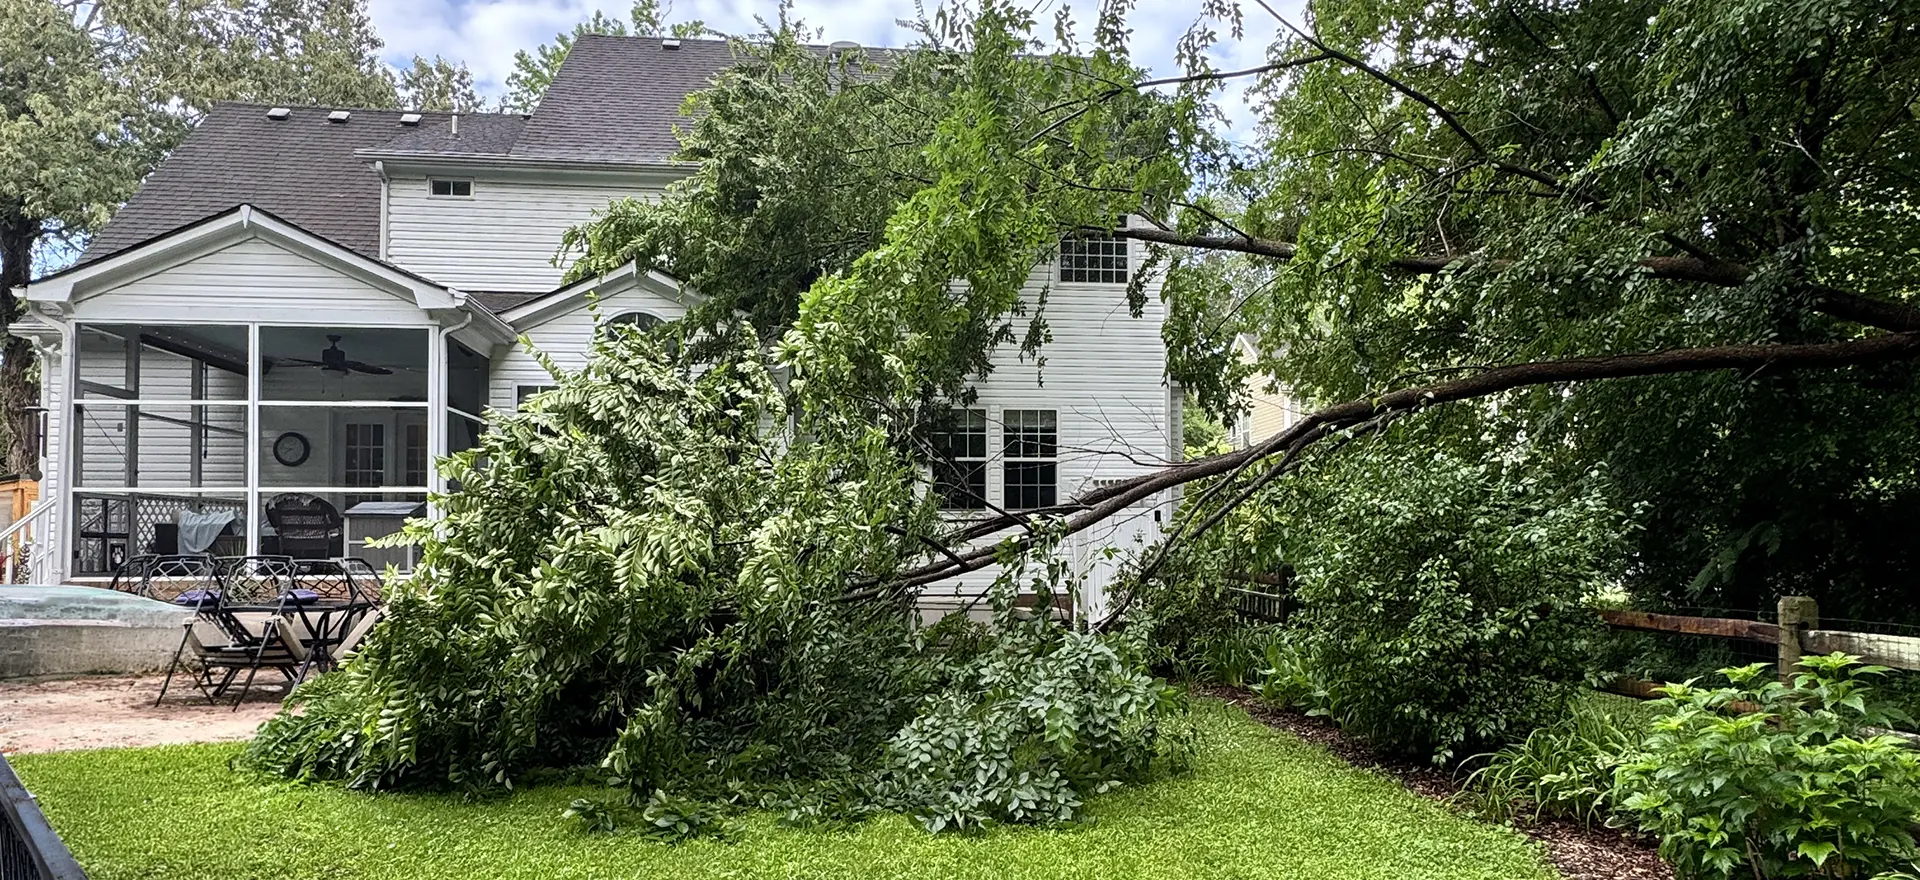
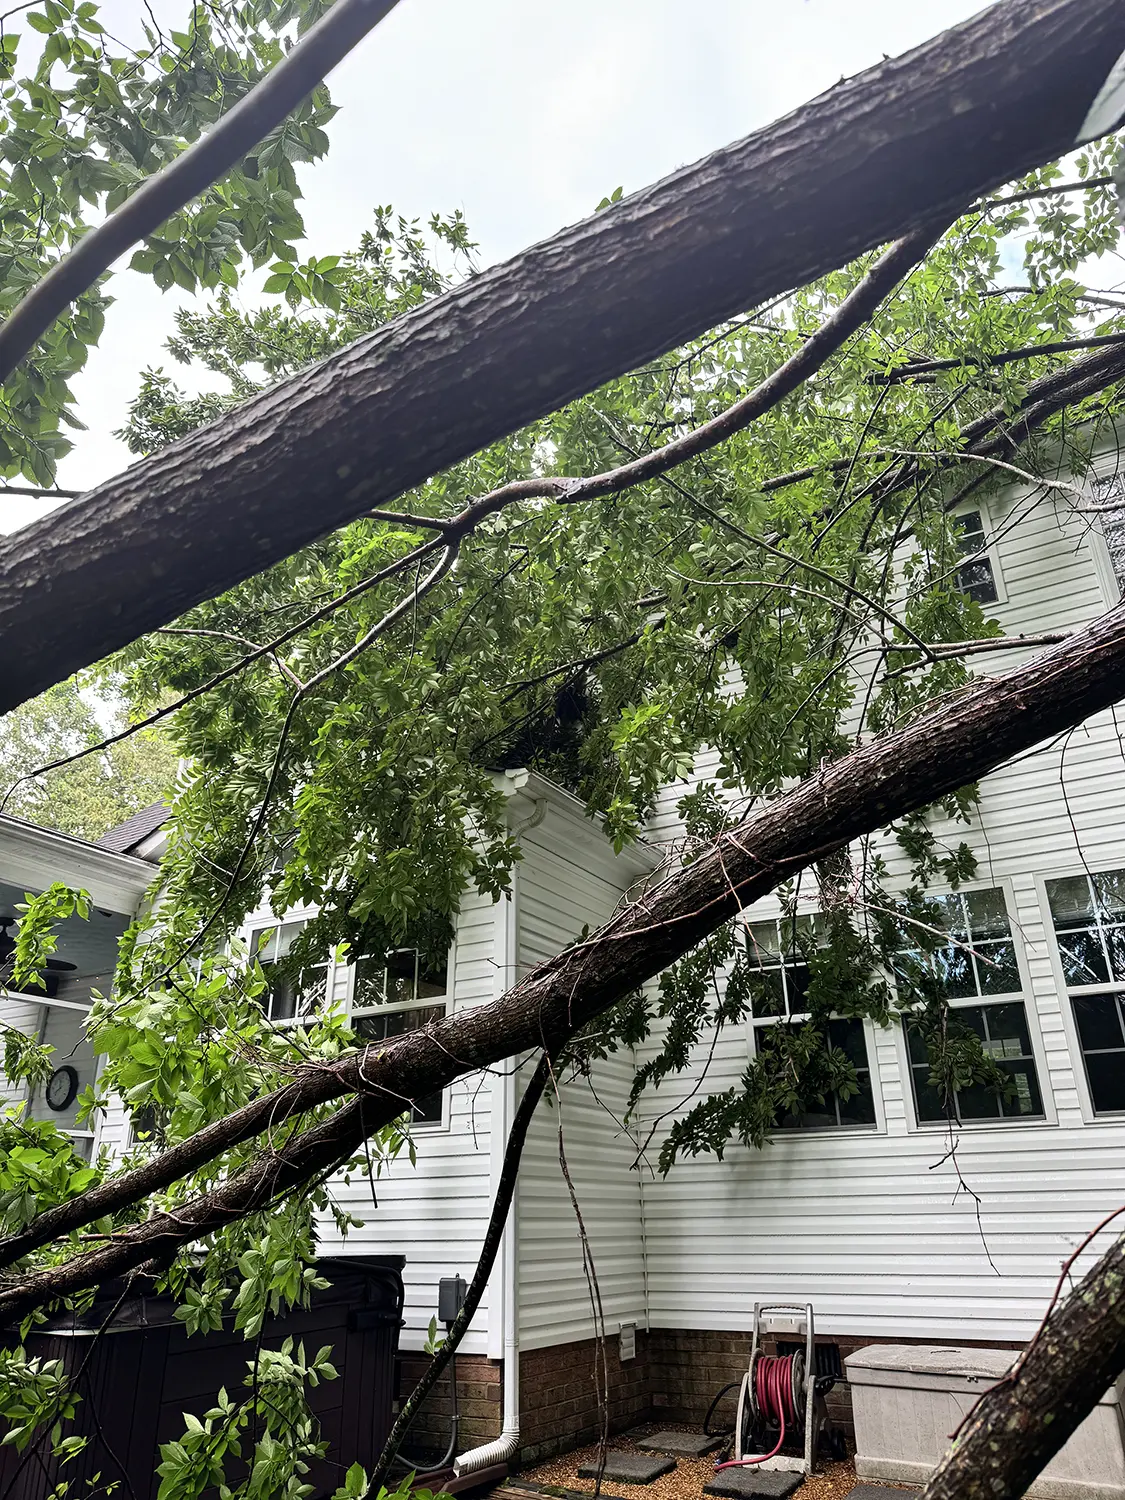
What to Do When a Tree Hits Your House

We hope it never happens, but in Hampton Roads, where wooded lots are as plentiful as the pop-up storms, tropical system and nor’easters we experience, it’s never out of the question. There may come a day when you’re awoken in the middle of night to the unmistakable “thud” of a tree landing on your roof. As jarring as that moment can be, the real anxiety is usually in the follow up. Who do you call first? What can you do yourself and what should you wait for an expert for? Who pays for the damage? While we always hope for the best, let’s walk through how to be prepared for the worst.

Step 1: Inspect for Immediate/Emergency Damage

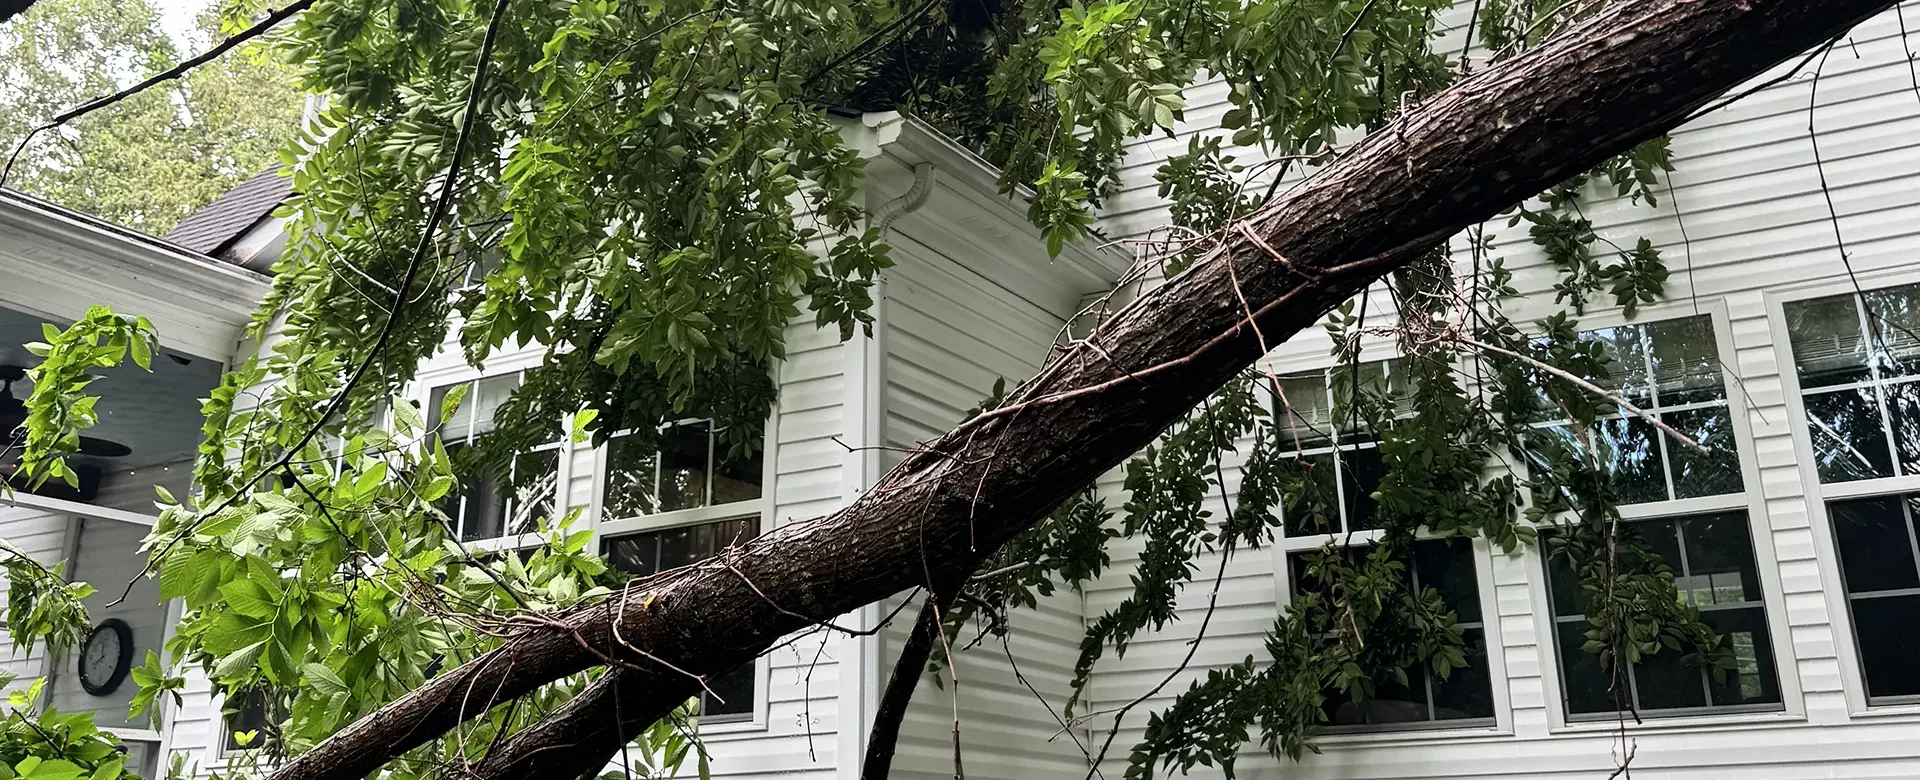
Depending on the size of the tree or the force with which it hit your home, some damage may be immediately obvious. If the tree has penetrated your roof, windows or siding, it will be hard to miss. But in most cases, this doesn’t actually happen. A tree lands on your roof and the damage is typically only exterior and often is underneath the tree in a way that may not be visible without equipment or risky roof access. Immediately following the incident, do a basic safety check first. Look for downed power lines, gas leaks, structural sagging – all things that mean you should vacate the house and call emergency services.

If you don’t see signs of imminent danger, access your attic to check for any penetration or daylight coming through. This may be hard to do if the incident happens at night, so double check when it’s daylight. Next, look for water intrusion – even if there isn’t a visible hole. You may see seeping water coming through the roof deck from the inside where shingles have been lifted or come off.

Whatever you find, document everything! Take photos and videos from multiple angles where it’s safe to do so. This will matter enormously for any insurance claims that need to be made. Unless it is absolutely critical in order to exit the home or for immediate safety, avoid moving debris or cutting the tree yourself, especially if it’s resting up against the house. Shifting the weight of a tree can actually cause further structural damage, and one large limb or piece being moved off the house can drag across and remove shingles, gutters, siding, etc.

Most insurance companies will actually require you to take “reasonable steps” to prevent any further damage, but this does not mean getting on your roof or putting yourself in danger. Tarping your roof is a job for a professional. Your “reasonable steps” should be calling a tree removal company and roofing company as soon as possible.

Step 2: Reach Out to Insurance

As soon as you’ve documented the damage, reach out to your insurance company, even if you’re not sure yet that you’ll need to make a claim. You can ask them specifics about what they consider “reasonable steps” to mitigate any damage, but again – no one should be asking you to put yourself in danger. Instead, ask them if they have preferred vendors for doing this kind of temporary repair work.

Clarify with your agent or representative what exactly is covered in your policy. If your home is not actually damaged by the tree, the cost of removal may or may not be covered. Schedule an insurance adjuster to come inspect your property as soon as possible. Have your documentation ready to share – some insurance companies will have you email or upload photos to their app or website. In the meantime, keep every receipt for any work you have done for immediate repairs, tarping or even hotel costs if you’ve had to vacate your home.

Phase 3: Call in the Professionals

Your insurance company may have preferred contractors and vendors they work with for this type of job, but most policies do not require you to use those vendors. Whether the reference comes from them or elsewhere, you should call a licensed, insured tree removal company ASAP. Until the tree is removed it will be impossible to know the extent of the damage done to the house. As best as you can, coordinate the timing between the tree removal and a roofing inspection by a licensed roofing contractor as closely as possible.

Even if you don’t see signs of a leak, bring in a professional roof inspector. Hidden damage like cracked shingles, missing shingles or compromised flashing are very common and not always visible from the ground. Get a detailed, written estimate from the roofing contractor to supply your insurance adjuster. If possible, work with tree removal and roofing companies who are experienced with insurance claims and who have a process in place for how those jobs are estimated and billed.

Once the inspection is complete and repairs are scheduled, make sure the area stays properly secured until the fix is complete. Especially since storms tend to come in waves in our area, it’s important to try and avoid any additional damage that could complicate a claim or put any of the fault on you.

Step 4: Finalize the Claim

Hopefully the damage is covered by your insurance and the vendors you’ve worked with understand the claims process. In many cases, contractors will bill your insurance company directly. But in other cases, you’ll pay out of pocket, submit your receipts to your claims agent and then your insurance company will cut you a check for what is covered, minus your deductible. This can be stressful, as it’s not always clear that all expenses will be covered, but the best thing you can do is document everything fully, and submit everything you have in an organized, clear way.

Contact a Local Expert

If you’re dealing with a felled tree on your house, Andrews Roofing can help. We have decades of experience with Hampton Roads homeowners and insurance companies, and we have processes in place to help you easily file claims for the work done to your home. We are licensed, insured and experienced. Contact us today for a roof inspection, professionally written estimate and quickly scheduled repair to help you get through this stressful time.
read more

Don’t Wait for Winter: How Summer Chimney Care Keeps Your Whole Roof Healthy

When the temperatures rise in Hampton Roads and your fireplace goes cold for the season, it can be easy to forget the chimney even exists.

That is, until the fall, when you’re ready to get cozy, lighting your first fire of the year and noticing a musty smell, a mysterious water stain on the ceiling, or worse, the sound of something potentially living up there?

Summer is actually the ideal time to inspect and address chimney issues before you’re ready to snuggle up in front of a fire. Here’s why regular maintenance matters for your roof, your home, and your peace of mind.

The Off-Season Advantage

Most homeowners think about their chimneys in late fall when the evenings start to cool down. The problem is that by then, roofing and chimney contractors are slammed with demand, and any damage that’s been accumulating all summer has had months to get worse. Scheduling your chimney inspection and any needed repairs during summer means no disruption in your routine or heat. It also means you’ll get more scheduling flexibility with contractors, dryer summer weather that’s better conditions for mortar work, flashing repairs and sealant curing, and peace of mind heading into the cooler months knowing your system is sound.

Summer is Wildlife Season

An uncapped or damaged chimney is prime real estate for birds, squirrels, raccoons, and other wildlife who are out and about during the warmer months. Once a chimney isn’t in frequent use, it becomes an attractive nesting spot that is dark, sheltered and elevated.

In addition to nesting materials being a major fire hazard and mess, when wildlife intrudes into your chimney, the cap can be physically damaged or removed entirely, leaving the flue wide open to rain, debris, and ongoing animal access. A raccoon or even a squirrel that’s been using your chimney all summer can cause a lot of damage that you might not know about until you go to light that first fall fire of the season. Fortunately, the solution to this is simple: a properly installed, well-fitting chimney cap keeps wildlife AND weather out.

The Importance of Chimney Caps

Not all chimneys are alike, which means not all chimney caps are either. There are standard sizes, which can be dealt with using stock caps but then there are non-standard sizes and special situations where custom caps are needed. This is not at all uncommon in Hampton Roads, given the number of older and historic homes here.

For standard flue openings, a stock chimney cap is practical, cost-effective and can be installed quickly, solving most animal intrusion issues immediately. But for those outliers, Andrews Roofing can custom fabricate chimney caps to fit virtually any opening, ensuring a proper seal, a professional appearance, and longevity.

A well-fitted chimney cap does more than keep animals out. It also:

  • Prevents rain and moisture from entering the flue and damaging the firebox, liner, and surrounding masonry
  • Blocks wind-driven debris from accumulating inside the chimney
  • Reduces downdrafts that can push smoke back into the home
  • Extends the life of your chimney liner and surrounding masonry

Why Your Chimney is so Important to Your Roof

Chimney leaks are one of the most common sources of roof-related water damage, but they are also often the most misdiagnosed. Your roof may be in great shape, but the connection points between it and the chimney may actually be to blame for the damage.

Brick Chimneys: Mortar and Masonry Concerns

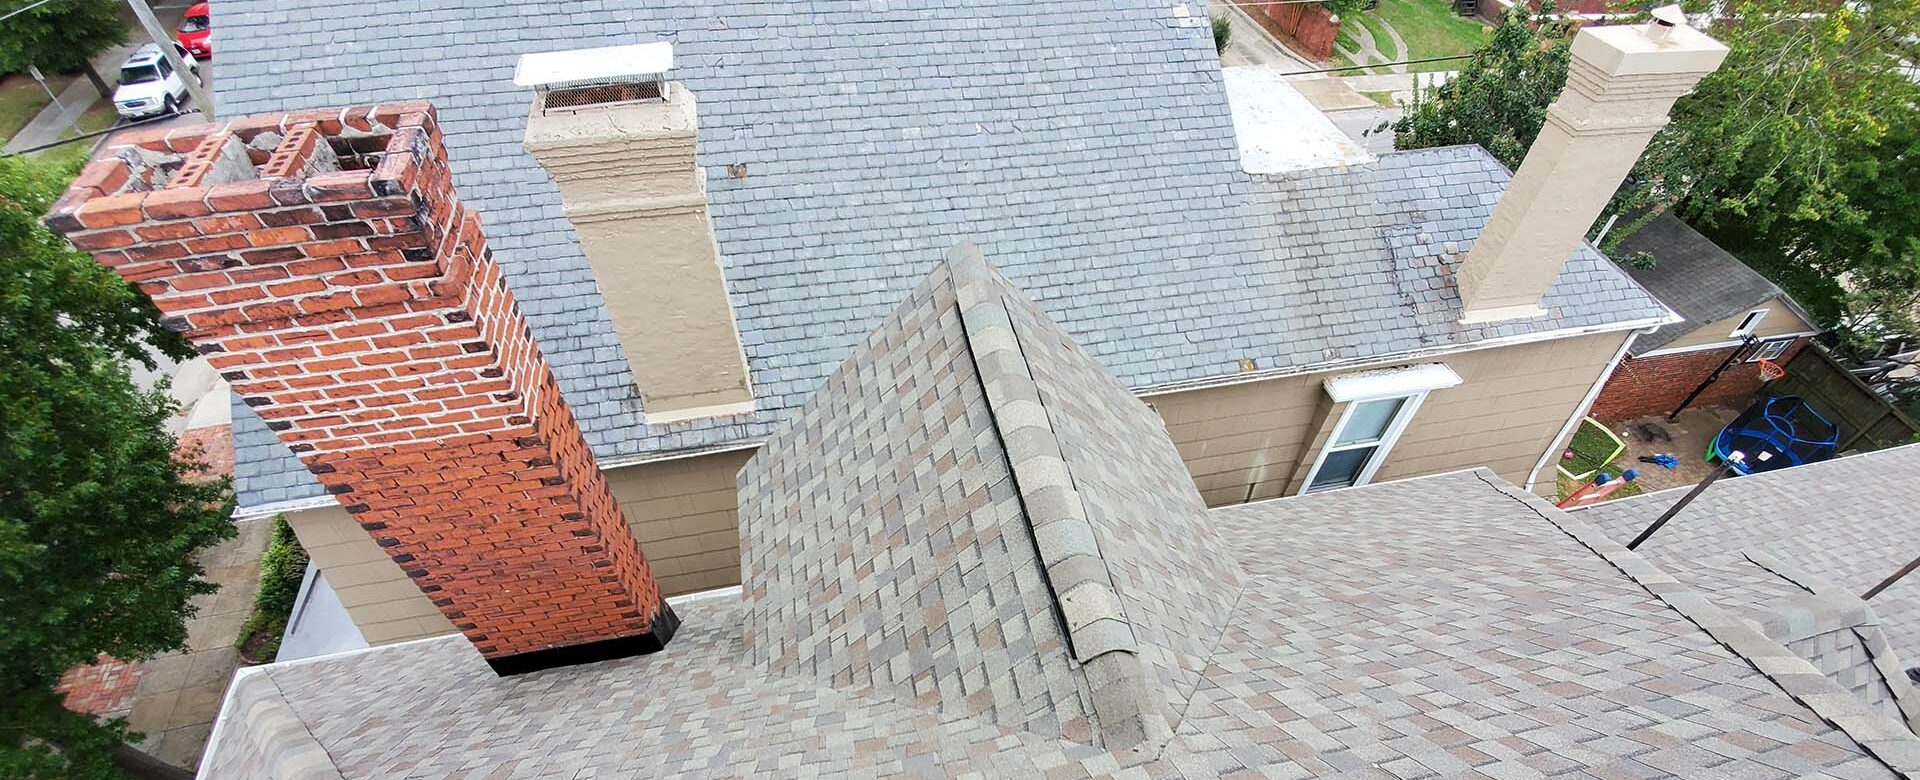
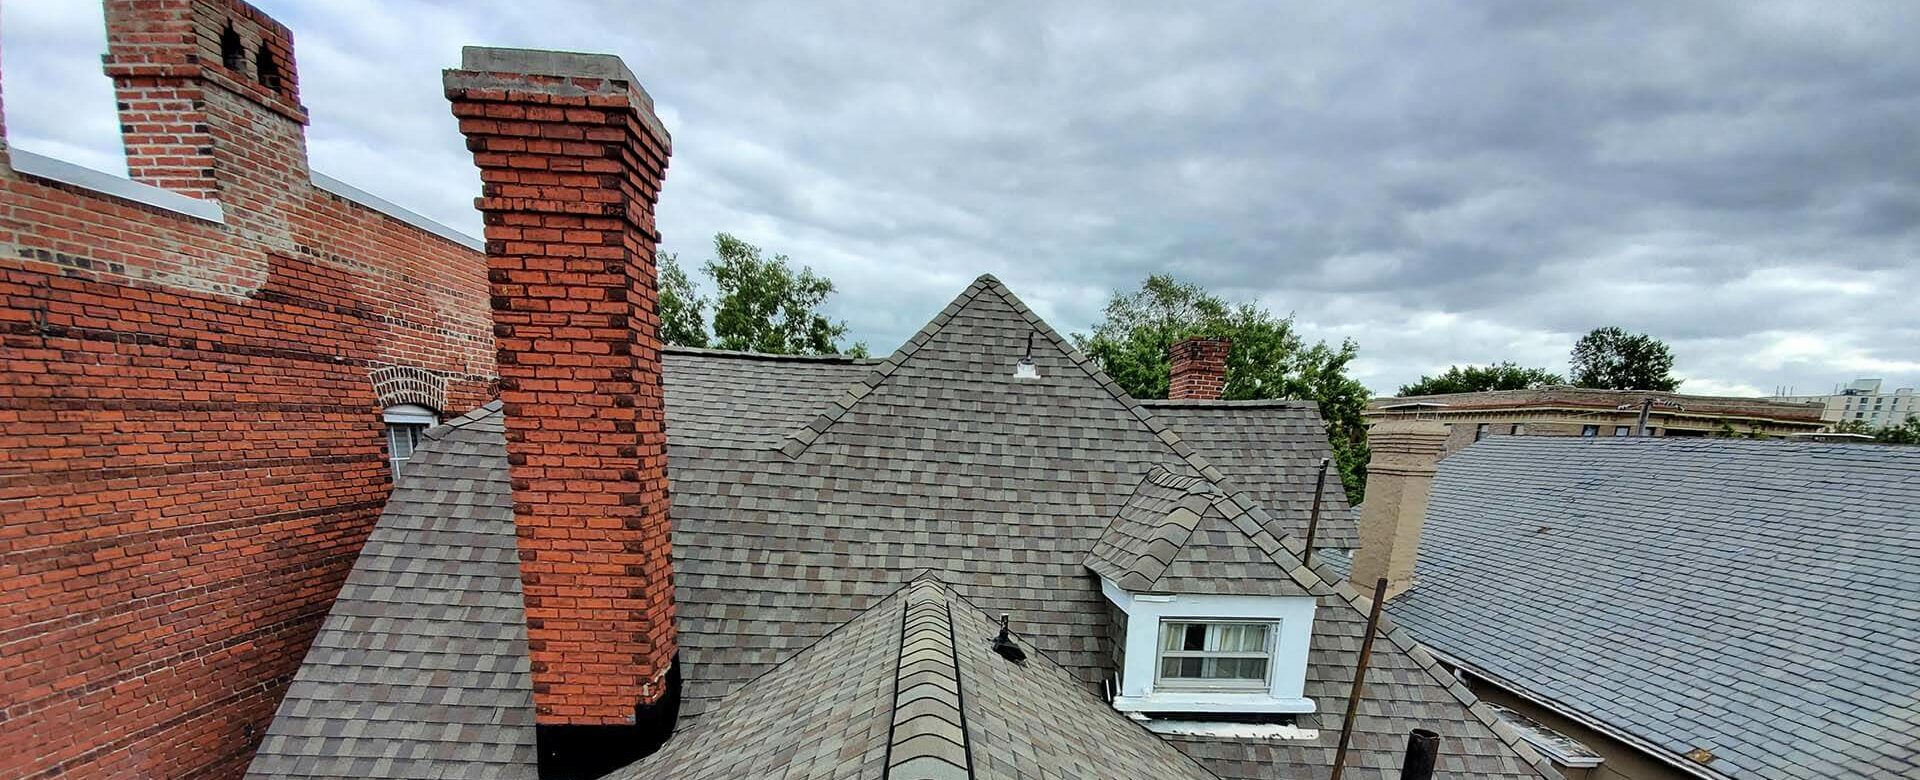
On brick chimneys, the most common leak source is deteriorating mortar – the material that holds the bricks together and seals the top crown of the chimney. Our coastal climate can be hard on masonry due to the summer heat, humidity and thaw-freeze cycles in the winter. That repeated expansion and contraction can eventually crack or erode mortar joints.

Once mortar begins to fail, water can get inside the masonry itself. Without remediation, bricks can literally pop off or become loose, causing significant structural deterioration and water intrusion into attic and living spaces. However, there are masonry specialists who can make these repairs, called “tuckpointing” which removes and replaces damaged mortar. Summer is the ideal time of year for this type of work for the mortar to dry quickly and effectively.

Vinyl-Sided Homes: Flashing Concerns

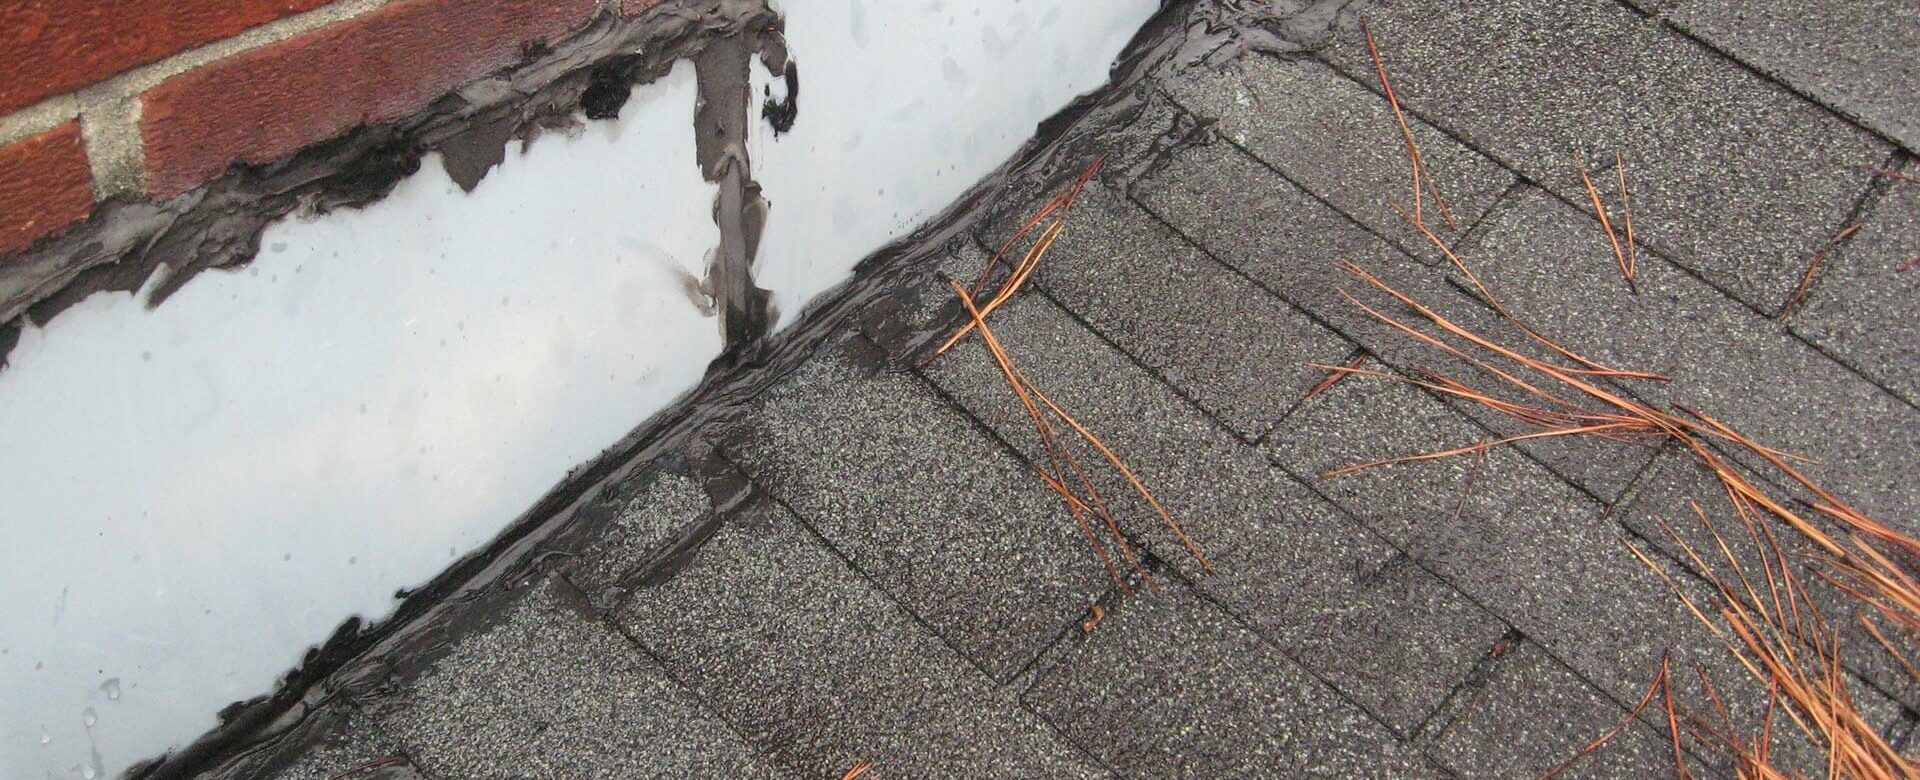
On homes with vinyl siding and vinyl sided chimneys, the critical element is flashing, that thin metal material installed around the base of the chimney where it meets the roof deck. When installed properly, step and counter flashing should create a watertight seal at this important transition point.

But flashing can fail for a number of reasons: poor original installation, sealant that has dried out and cracked over time, or physical damage from storms or settling. Because the failure point is often hidden under the siding or shingles, flashing leaks can be particularly tricky to diagnose and are often blamed on the roof itself when the chimney is actually the culprit.

Hampton Roads Humidity and Chimney Health

Hampton Roads’ coastal climate brings year-round moisture challenges that accelerate the wear on chimneys faster than drier inland climates. High humidity means mortar stays damp longer, sealants and caulks degrade more quickly, and any small opening in a cap, crown, or flashing becomes an invitation for ongoing water intrusion. That’s why staying ahead of chimney maintenance in our region is essential.

Check It Off Your List

At Andrews Roofing, we can inspect, and in some cases repair or replace chimney-related roofing components. From flashing to custom-fabricated chimney caps built to fit your specific chimney, we have the expertise to take care of it. If it’s been more than a year since your chimney was inspected, or if you’ve noticed any signs of water intrusion near the fireplace or in the attic above it, now is the time to act. Contact us today to schedule your chimney and roof inspection before summer flies by.

read more

DIY Roof Repairs: What Could Go Wrong

“What could go wrong” when trying to repair your own roof isn’t a question – it’s an inevitability.

We know many homeowners take pride in tackling repairs and home improvement projects themselves. Leaky faucet – easy enough. Swapping out a light fixture? A little more complicated, but doable for the advanced weekend warrior. But when it comes to your roof, the DIY mindset can quickly turn from “I’ve got this” to “I’ve made a very expensive mistake.”

It’s not uncommon for our office to get calls that start with, “Well, we tried to fix it ourselves…” Roof repairs are one of the most commonly underestimated home maintenance tasks and also one of the most dangerous. Here’s a look at the roof repairs we see homeowners often attempt on their own, and what can (and frequently does) go wrong.

Common DIY Roof Repairs Gone Wrong

1. Replacing a Few Missing or Damaged Shingles

No big deal, right? On the surface, this seems straightforward: remove the damaged shingle, nail a new one in place, seal it, and move on.

What goes wrong:

  • Improper nail placement can puncture the underlayment, creating new leak points
  • Incorrect shingle alignment disrupts water flow
  • Using the wrong type or color of shingle compromises performance and appearance
  • Sealant is applied incorrectly or not at all

In Southeast Virginia, where heavy rain and high winds are common, even small installation mistakes can allow wind-driven rain to penetrate the roof system, causing more damage than what likely would have happened if you’d left the shingle alone.

2. “Patching” a Roof Leak with Sealant or Tar

Caulk and roofing tar feel like quick, easy, and affordable fixes for a leak, and they’re often the first thing homeowners reach for. But this “quick fix” can cause long-term problems.

What goes wrong:

  • Leaks are rarely where water enters the home; they travel along decking and framing, so sealing an area where the leak has penetrated is probably not solving the problem
  • Sealants dry out, crack, or wash away over time
  • Patching the visible issue masks the underlying problem

In humid coastal climates, trapped moisture can lead to rot, mold, and decking failure long before the leak becomes obvious again, which means you’ve created a secondary problem that is now going to require structural repair.

3. Cleaning or Adjusting Flashing

Loose flashing around chimneys, skylights, and roof penetrations is a common DIY target. You can easily see the problem and the solution feels straightforward. But this fix actually takes much more skill than you would imagine.

What goes wrong:

  • Flashing is bent or reinstalled incorrectly
  • Existing waterproofing layers are damaged
  • Fasteners are driven into the wrong locations

Flashing failures are one of the leading causes of roof leaks—and one of the easiest ways for DIY work to create long-term water intrusion. Not to mention this type of work is particularly dangerous for someone not accustomed to working on roofs.

4. Gutter “Fixes” That Affect the Roof

Homeowners often clean, reattach, or adjust gutters without realizing how closely they interact with the roofing system.

What goes wrong:

  • Improper pitch causes water to back up onto the roof edge
  • Fascia boards are damaged during reattachment
  • Hidden water damage and rot go unnoticed

In areas like Hampton Roads, where sudden downpours are common, poor drainage can overwhelm roof edges and accelerate deterioration.

What DIY Roof Repairs Can Really Cost You

1. More Damage Than You Started With

One misstep—literally or figuratively—can turn a minor issue into structural damage. Water intrusion doesn’t announce itself right away, and by the time it does, repairs are often far more extensive (and expensive) than the original problem.

2. Voided Warranties

Many roofing manufacturers require that repairs and modifications be performed by licensed professionals. DIY work – even when well-intentioned and effective – can void material warranties, leaving homeowners unprotected when future issues arise.

3. Insurance Complications

If a DIY repair fails and causes interior damage, insurance companies may deny claims due to improper workmanship or unlicensed repairs. This is especially risky following storms or high-wind events common in Southeast Virginia.

4. Serious Safety Risks

This is the part that cannot be overstated.

  • Roofs are steep, slick, and unforgiving
  • Asphalt shingles become dangerously slippery in heat, humidity, or after rain, especially when covered with mold or mildew
  • Falls from even one story can result in severe injury

Every year, homeowners are seriously injured attempting roof work because they don’t have the proper knowledge, safety equipment or understanding of structural weak points of their own home. Don’t damage your home AND yourself with risky DIY repairs.

When in Doubt, Call a Professional

Professional roofers understand the composition of a roofing system, how water behaves under different weather conditions, how the regional climate impacts materials and installation, and how to work safely in their environment.

A professional roofing inspection can often catch issues homeowners didn’t even realize were connected to the issue they’ve identified, saving them from much more costly repairs down the road. So, if you’re noticing missing shingles, leaks, sagging areas, or storm damage, or even if you’re unsure what you’re seeing but you know something is wrong, calling a licensed roofing professional is the safest, smartest first step.

DIY projects have their place, but your roof isn’t one of them. Contact Andrews Roofing today.

read more

Resolve to Protect Your Home with a Seasonal Maintenance Checklist

Start the new year out right by checking a few important items off your home-maintenance to-do list.

Just like setting personal resolutions at the first of the year, resolving to take better care of your home, and especially your roof, is an investment that pays off all year long.

In Hampton Roads (HRVA), roofs face a unique combination of challenges: coastal humidity, salt air, heavy rain, high winds, summer heat, and the occasional winter freeze. Seasonal maintenance helps homeowners catch small issues early, protect their roofing system, and extend the life of their roof.

We’ve broken down your annual roof care into seasonal, home-owner safe checklists to make these tasks manageable and effective – without ever having to climb on the roof!

Winter: Monitor & Protect

While winter doesn’t usually bring heavy snow to Southeast Virginia, cold snaps, fluctuating temperatures and freezing rain can still cause issues.

Winter Maintenance Checklist

  • Watch for interior warning signs: Keep an eye out for water stains on ceilings or walls, peeling paint or unexplained humidity in certain rooms or areas.
  • Check attic moisture levels: Condensation or frost inside your attic may indicate ventilation problems, which could be fixed just by shifting insulation.
  • Monitor roof edges: Heavy icicles or uneven melting can signal insulation or airflow issues from the inside.
  • Avoid walking on the roof! Use a roof rake from the ground if necessary, never climb on icy surfaces.

Why it matters to HRVA: Our inconsistent winter temperatures can cause freeze-thaw cycles that even when brief can make existing cracks worse or create gaps around flashing.

Spring: Reset After Winter Weather

Even mild winters can leave behind hidden wear and tear, especially after wind events and fluctuating temperatures.

Spring Maintenance Checklist

  • Do a ground-level roof inspection: Look for missing, curling, or cracked shingles as well as visible damage around chimneys, vents, and flashing. Do a visual inspection to see if any sections of gutters have pulled away from the roofline and ensure all gutter downspouts are still securely attached.
  • Clean gutters and downspouts: Remove leaves, pine needles, and debris and ensure downspouts are directing water well away from your foundation.
  • Inspect attic ventilation: Look for moisture, condensation, or mildew and make sure soffit and ridge vents aren’t blocked by insulation.
  • Trim back trees and branches: Prevent damage caused by overgrown or loose limbs and reduce debris buildup during spring storms.

Why it matters to HRVA: Spring rains are frequent, and clogged gutters or compromised flashing can quickly lead to leaks if winter damage isn’t addressed.

Summer: Manage Heat, Humidity & Storm Exposure

Southeast Virginia summers bring intense heat, high humidity, and sudden thunderstorms – all of which put stress on roofing systems.

Summer Maintenance Checklist

  • Check attic insulation: Look for compressed, displaced, or damp insulation. Uneven insulation can trap heat and drive-up energy costs.
  • Monitor attic temperatures: Excessive heat may indicate poor ventilation – upper floors that feel noticeably hotter can be a warning sign.
  • Inspect roof for gaps: From the ground, check vent boots and flashing for cracking or separation.
  • After storms, perform visual checks: Look for new debris, shingle movement, or granules collecting near downspouts, which could signal shingle deterioration.

Why it matters to HRVA: High heat accelerates shingle aging, while humidity and poor ventilation can lead to moisture problems inside the attic—especially in older homes.

Fall: Clear, Seal & Prepare for Cooler Weather

Fall is one of the most important seasons for roof maintenance—and one of the best times to address minor issues, when the temperatures are more forgiving.

Fall Maintenance Checklist

  • Thoroughly clean gutters: Falling leaves can quickly cause blockages and backed-up gutters can lead to fascia damage and interior leaks.
  • Inspect flashing and seals: Pay special attention to chimneys, skylights, and vent pipes. Any loose flashing or separating seals are bound to invite issues when the winter temperature fluctuations start.
  • Check attic air sealing: Look and feel for drafts around attic hatches or recessed lighting. Drafty air or increased temperatures may indicate the need for insulation replacement or better sealing.
  • Schedule a professional roof inspection: Fall is ideal for preventative maintenance before winter weather arrives.

Why it matters to HRVA: Fall storms and lingering humidity mean small vulnerabilities can worsen quickly if left unattended.

Resolve to Protect Your Home

Resolving to care for your roof season by season is one of the smartest and easiest ways to protect your home’s structure, comfort, and value. Routine visual checks and preventative maintenance can help extend the life of your roof, reduce emergency repairs, and identify issues before they become costly problems.

Andrews Roofing is here for every season.

If your seasonal checklist reveals concerns, or if you’d simply like an expert set of eyes on your roof, Andrews Roofing offers professional inspections and maintenance services throughout the Tidewater region. Our team understands the unique demands of the local climate and can help keep your roofing system performing its best year after year. Contact us today!

read more

Hurricane Prep for Homeowners in Southeast Virginia

Hurricane season is an unfortunate, but familiar reality for homeowners in Hampton Roads and across Southeast Virginia.

Every year the local and national meteorologists take their best bet on how many storms we’ll have and how severe they may be, but anyone who has lived here long enough knows – you truly can’t predict the weather when it comes to tropical storm systems. But even if you can’t control how and when the storms will hit, there are things you can control around your own home —starting from the top down. Your roof and gutters are your first line of defense against high winds and heavy rain, and proper preparation can make a major difference in minimizing potential storm damage.

As we head into high hurricane season, when historically the storms in our region are the most frequent and severe, we’ve compiled some practical ways you can prepare your home, including steps that can help you in the event you need to file an insurance claim.

  1. Inspect Your Roof for Weak Points

Before hurricane season ramps up, schedule a professional roof inspection. A roofing contractor can check for:

  • Loose, missing, or damaged shingles
  • Exposed fasteners or flashing issues
  • Soft spots in decking that may indicate water damage
  • Signs of aging or deterioration in your roof system

If issues are found, addressing these small problems now, by having a professional do the repairs, can help prevent much larger issues if a storm rolls through. If major damage occurs, you’ll also have paperwork showing that your roof was recently inspected and/or repaired and so any subsequent damage was, in fact, caused by the storm itself. This can come in handy when filing insurance claims.

  1. Clean and Secure Gutters and Downspouts

Gutters play a critical role in keeping water away from your home’s foundation. Before a storm, clear out any leaves, sticks, or debris that may be clogging them. Also, check that your gutters and downspouts are securely fastened to your home—strong winds can easily tear loose systems away, creating projectiles that could cause even more damage. Consider installing gutter guards if you live in a heavily wooded areas where pine needles, leaves or other debris buildup is a recurring problem.

  1. Trim Overhanging Branches

Tree limbs that hang over your roof or gutters can break during high winds and cause serious damage. Trimming back trees from around your house before storm season will reduce the likelihood of branches penetrating and damaging your roof. It also reduces the impact of leaves clogging your gutters. Call out a professional tree company before the storms hit, because once they do, it could be months before any tree company in the area will have availability again.

  1. Document Your Roof and Home Exterior

If you’ve ever had to file an insurance claim for storm damage you know how important this step is. In the event of storm damage, having clear, up-to-date photos of your roof and home exterior can make the insurance claims process much smoother. Take detailed photos and videos of your roof, gutters, siding, and yard before hurricane season begins and before each major storm is predicted to come through the Tidewater region. Store them digitally in case you need to access them quickly. Having them on your phone is ideal, in case computers or other hardware is damaged or inaccessible.

  1. Review Your Insurance Coverage

Now is also the time to check your homeowner’s insurance policy. Make sure your coverage is current and that you understand what is and isn’t covered when it comes to wind and water damage. If necessary, update or increase your insurance coverage. This is especially important for homeowners without mortgages. While individuals with mortgages typically have to keep their insurance at a particular level to satisfy the lender, unmortgaged homes don’t have this requirement. If your home is paid off and it’s been a while since you’ve updated your coverage, now is the time to do so. Keep a copy of your policy and your insurance company’s contact information in a safe, waterproof location as well as in your phone for easy access.

  1. Schedule Regular Maintenance

The best preparation is ongoing care. Regular roof and gutter maintenance not only protects your home during hurricane season but also extends the lifespan of your roof. Consider setting up annual inspections with a trusted local roofing company to ensure your roof is always ready to face the elements.

Trust Andrews Roofing to Help You Weather the Storm

At Andrews Roofing, we’ve been helping Hampton Roads homeowners protect their homes for decades. From routine inspections to emergency repairs after a storm, our team has the expertise for our particular region to keep your roof performing at its best. If you’d like to schedule a roof inspection before hurricane season, contact us today.

read more

How Small Hail Can Damage an Asphalt Fiberglass Shingle Roof

Recently Hampton Roads has experienced a rash of late-spring severe weather events, which have included small hailstorms. You may have experienced damage to your property from these storms that was obvious: cracked windows, dented car hoods, beaten or broken plants and landscaping. But did you know there may also be damage that you can’t see immediately?

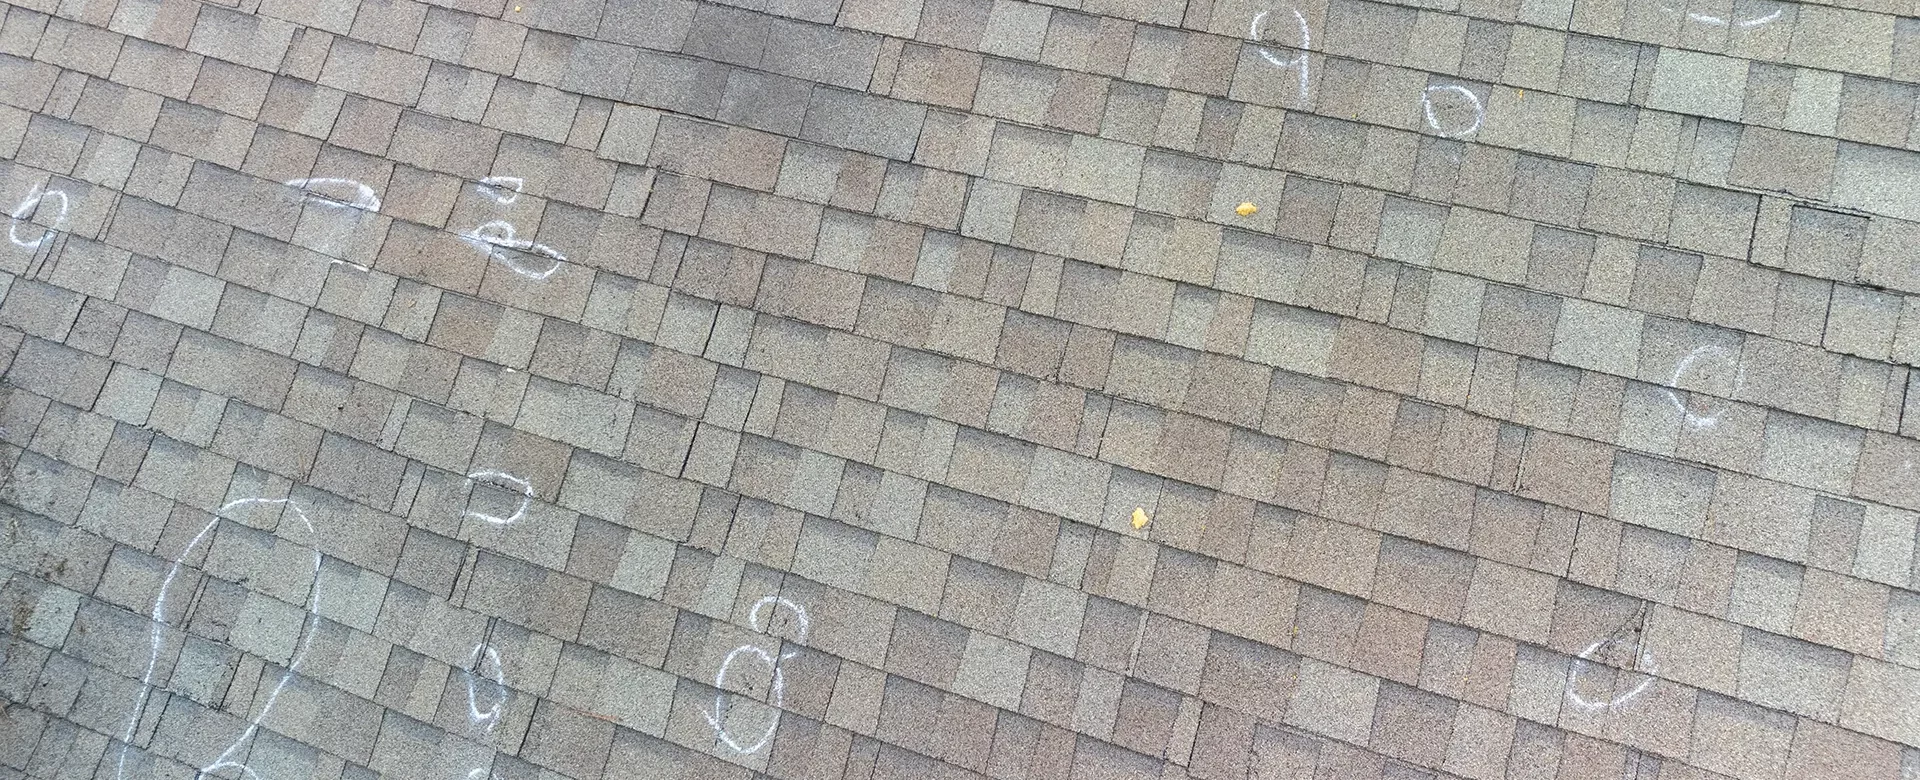
Small hail, generally considered to be less than 1 inch in diameter (think pea to marble-sized), can still cause damage to your home’s asphalt fiberglass shingled roof – especially over time and with repeat incidents. The impact may seem minimal, but if these types of severe storms continue as they have been, there are signs you should keep an eye out for and damage that can add up.

Granule Loss

The most common damage that occurs from small hail is the dislodging of the protective granules on the surface of the shingles. These granules shield the underlying asphalt and fiberglass layers from direct sunlight, which causes UV damage and weathering. Even small hail can have a big impact on your roof if the storm is long enough, severe enough, or if the hail events happen repeatedly.

What you are likely to notice if this damage occurs is granules accumulating in your gutters and downspouts after a hail event or rainstorms that occur shortly after the hail event. When the granules are degraded, you’ll start to notice shingles that are brittle, and that will begin to crack and fail over time.

Bruising and Indentations

Small hail is unlikely to puncture your shingles; however, it can cause small indentations or bruises on the shingle surface. These impact points can weaken the shingle structure at a microscopic level. Pressure from the hailstones (especially in the case of slightly larger hail), can actually cause the asphalt layer to compress, while also crushing the asphalt granules. While these compression points may not immediately cause leaks, they can create points of weakness where cracking or further granule loss is more likely to occur – especially when temperatures change.

Exposure of the Fiberglass Mat

In some cases, if the hail is severe or torrential enough, the impact can be forceful enough to not only remove granules but also damage or expose the fiberglass mat beneath the asphalt. This mat is what provides tensile strength to each shingle, so even small tears or damage to the fiberglass layer can increase the risk of roof damage, especially when wind becomes involved. Shingles that are damaged down to this layer should be repaired and replaced as soon as possible to prevent further damage to the roof decking.

Damage to Flashing and Other Components

Even if your shingles don’t experience significant damage, it doesn’t quite mean you’re in the clear. Small hail can still damage metal flashing around vents, chimneys, and other roof penetrations by denting or loosening them. Gutters and downspouts can also sustain minor dents from small hail or loosening from the roof edge or side of the home. While this may not cause an immediate leak, it can affect their functionality, which over time can cause water damage to other parts of your home. It may also simply affect the aesthetics of your home’s exterior.

Bottom Line: Accelerated Weathering

The cumulative effect of this type of hail damage (granule loss, bruising, fiberglass exposure, denting) can accelerate the overall weathering process of your roof. Exposed asphalt deteriorates faster; the shingles lose their flexibility and become more brittle and likely to break. This can shorten the lifespan of your entire roof, while also making it more susceptible to damage from other types of subsequent weather events.

Things to Consider:

  • Age and Condition of the Roof: Older roofs or those already in poor condition are more susceptible to damage from even small hail. Brittle shingles will be more easily damaged.
  • Duration and Intensity of the Hailstorm: A prolonged storm with even small hail can cause more cumulative damage than a brief one.
  • Wind: Small hail accompanied by strong winds can exacerbate the damage by driving the hailstones with more force and potentially lifting shingle edges, making them more vulnerable to impact.

What to Do Next

It’s always a good idea to have your roof inspected by a qualified professional after any hailstorm, even if the hail appears small, to assess for potential damage that might not be immediately visible. This is especially true for older roofs, roofs with existing damage or in the case of severe, prolonged, or repeated hail events.

The professionals here at Andrews Roofing are highly experienced with the Hampton Roads region and the types of damage that are common with our weather conditions. As a locally owned and operated licensed roofing company, we do our best to treat every customer like our neighbors – because they are! Contact us today if you have any concerns about the condition of your roof after a severe southeast Virginia weather event.

read more