

Leaks & Service Repairs

757-399-3066 ext 3 (Leaks & Service Repairs)

Reroof Estimates & Inspections

757-399-3066 ext 1 (Reroof Estimates & Inspections)

Tag: chimney leak

Never Underestimate a Nor’easter

Fortunately, last month’s nor’easter came and went through Hampton Roads without too much drama. No evacuation orders, no named storm, or boarded-up windows, just some tidal flooding in the usual spots and some downed branches here and there. That may have made it easy to shrug off, but you shouldn’t.

Over the last several years, nor’easters have caused more storm damage across Virginia Beach, Chesapeake, Norfolk, Portsmouth, and Suffolk than hurricanes have. We have gone a good while without a major hurricane making a direct hit, so it’s tempting to let our guards down and assume there isn’t property damage or things to keep an eye out for. But the way a nor’easter impacts our homes is different, and the damage can show up quietly, weeks later. Here’s what to keep an eye out for and how to plan ahead for this more and more common weather pattern.

Direct Rain vs. Wind-Driven Rain

Roof design relies on gravity to do its thing. Shingles overlap so that water running downhill passes over each seam and keeps going until it reaches the gutter. All the major pieces of a roofing system make the assumption that this is how water will typically work.

Wind-driven rain doesn’t care about gravity – it cares about force and inertia. When wind is forcing rain sideways, or even upward along a wall or roof surface, water can get forced under shingle edges, behind flashing, and into gaps that would otherwise never see moisture, even in other soaking rains.

A Nor’easter Specific Issue

A hurricane is intense and brief. A nor’easter is a long, steady grind, which has a different impact on your roof. A nor’easter can sit over the coast for a day or two. That means that wind-driven rain gets hours and hours to find your roof’s weak spot. Then, after a day or days of constant moisture, materials stay wet. The effects can still be devastating, but without any big give away. After a hurricane, people check their roofs. After a nor’easter, they usually do not. Slow leaks go unnoticed until the damage has had time to spread.

Unexpected Leak Spots

The spots where this damage shows up may be unexpected. Here are some places that we see wind-driven rain cause trouble that are different from regular roof leaks.

  • Soffits and eaves. Wind can push rain up into soffit vents and under the lower edge of the roof, where it soaks insulation and framing.
  • Porch and overhang edges. An overhang blocks rain falling straight down. Wind-driven rain simply goes around it.
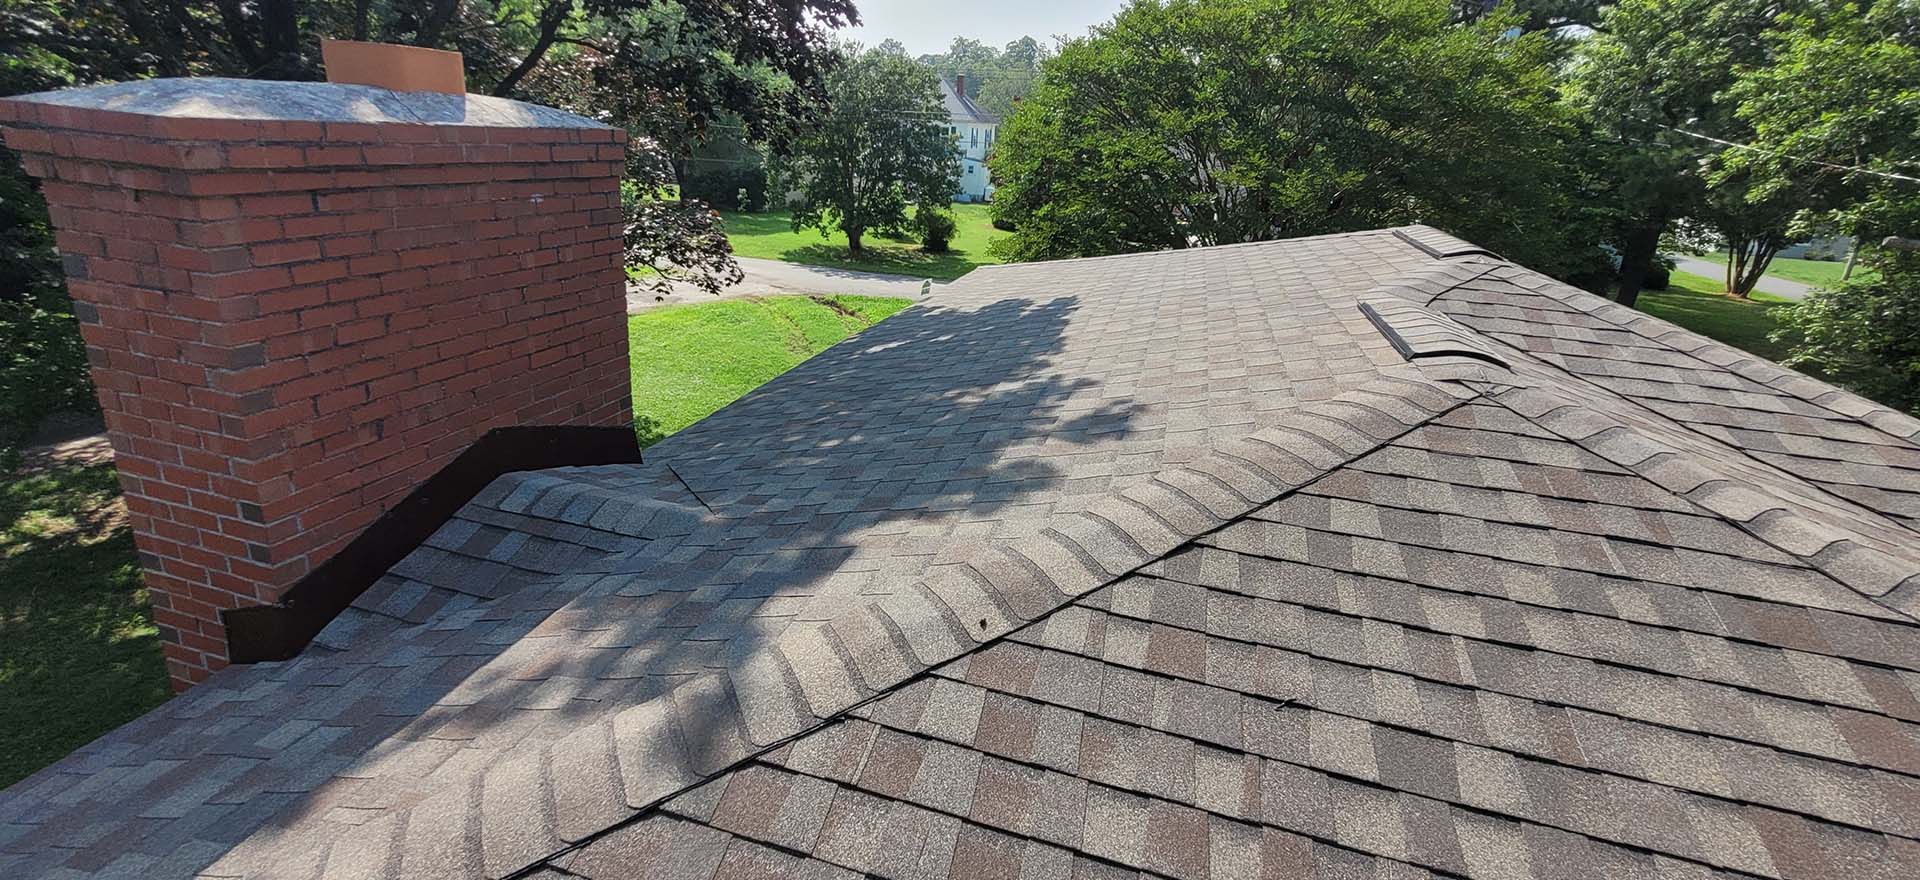
  • Chimney and dormer flashing. These are complicated transitions with a lot of seams, and sustained winds will test every one of them.
  • Roof vents and gable vents. Vents have to let air in and out, which gives wind-driven rain a path in as well.
  • Window and siding intersections near the roofline. Sometimes the roof is fine and the water is getting in where the siding or trim meets it.
  • Gutters that overflow or back up. In heavy wind and rain, undersized or clogged gutters spill water against the fascia and behind the gutter line.

Why the Leak May Show Up Far from the Source

One reason these leaks are so frustrating is that the stain that finally appears on your ceiling days or weeks later may not be directly under or even near the spot where the water got in. When water enters at a flashing seam or vent, it can run along the roof decking, down a rafter, and even across insulation before finally dripping through the ceiling feet away. That’s why painting over the stain and calling it a day rarely works. The real entry point is somewhere else, and until someone follows the water trail and finds the source, the water can keep coming in every time the winds line up from the same direction.

Signs to Watch for After a Storm

Take a few minutes after any significant nor’easter to look for:

  • Ceiling or wall stains, even faint ones
  • A musty smell in a room or closet
  • Damp or compressed insulation in the attic
  • Bubbling or peeling paint near the roofline or on upper walls
  • Leaks that only show up when the wind blows from a certain direction

That last one is a classic sign of wind-driven rain. If a room stays dry for months and then leaks during one particular kind of storm, then it’s probably about wind direction.

What You Can Do

Tackle only the simple and safe things on your own. Grab a flashlight and check your attic for damp spots, stains on the underside of the roof deck, or wet insulation. From the ground, look over the roofline and gutters for anything that seems out of place. Take dated photos of anything you find, since that documentation helps if you end up filing a claim. Coverage for wind-driven rain varies by policy, so it is worth checking with your insurance agent about how yours handles it.

If you find something, or if you have had a leak that no one has been able to track down, a roofing inspection by a licensed contractor can trace water back to its true entry point. For homes in our area, the fixes that make the biggest difference with wind-driven rain are usually well-sealed flashing details, a secondary water barrier under the roofing material, correct ventilation, and gutters sized for the volume of water they will actually be expected to handle.

Don’t Wait for the Hurricane

Since Hampton Roads sits right where the Chesapeake Bay meets the Atlantic, nor’easters are an inevitable part of life here. The good news is that wind-driven rain leaks are very fixable, usually do not require major roof repairs or replacements, and can be relatively inexpensive when caught early. If last month’s storm left you wondering about your roof, or you would like a second set of eyes before the next one, Andrews Roofing is happy to take a look. Contact us today for a professional roofing inspection.
read more

Don’t Wait for Winter: How Summer Chimney Care Keeps Your Whole Roof Healthy

When the temperatures rise in Hampton Roads and your fireplace goes cold for the season, it can be easy to forget the chimney even exists.

That is, until the fall, when you’re ready to get cozy, lighting your first fire of the year and noticing a musty smell, a mysterious water stain on the ceiling, or worse, the sound of something potentially living up there?

Summer is actually the ideal time to inspect and address chimney issues before you’re ready to snuggle up in front of a fire. Here’s why regular maintenance matters for your roof, your home, and your peace of mind.

The Off-Season Advantage

Most homeowners think about their chimneys in late fall when the evenings start to cool down. The problem is that by then, roofing and chimney contractors are slammed with demand, and any damage that’s been accumulating all summer has had months to get worse. Scheduling your chimney inspection and any needed repairs during summer means no disruption in your routine or heat. It also means you’ll get more scheduling flexibility with contractors, dryer summer weather that’s better conditions for mortar work, flashing repairs and sealant curing, and peace of mind heading into the cooler months knowing your system is sound.

Summer is Wildlife Season

An uncapped or damaged chimney is prime real estate for birds, squirrels, raccoons, and other wildlife who are out and about during the warmer months. Once a chimney isn’t in frequent use, it becomes an attractive nesting spot that is dark, sheltered and elevated.

In addition to nesting materials being a major fire hazard and mess, when wildlife intrudes into your chimney, the cap can be physically damaged or removed entirely, leaving the flue wide open to rain, debris, and ongoing animal access. A raccoon or even a squirrel that’s been using your chimney all summer can cause a lot of damage that you might not know about until you go to light that first fall fire of the season. Fortunately, the solution to this is simple: a properly installed, well-fitting chimney cap keeps wildlife AND weather out.

The Importance of Chimney Caps

Not all chimneys are alike, which means not all chimney caps are either. There are standard sizes, which can be dealt with using stock caps but then there are non-standard sizes and special situations where custom caps are needed. This is not at all uncommon in Hampton Roads, given the number of older and historic homes here.

For standard flue openings, a stock chimney cap is practical, cost-effective and can be installed quickly, solving most animal intrusion issues immediately. But for those outliers, Andrews Roofing can custom fabricate chimney caps to fit virtually any opening, ensuring a proper seal, a professional appearance, and longevity.

A well-fitted chimney cap does more than keep animals out. It also:

  • Prevents rain and moisture from entering the flue and damaging the firebox, liner, and surrounding masonry
  • Blocks wind-driven debris from accumulating inside the chimney
  • Reduces downdrafts that can push smoke back into the home
  • Extends the life of your chimney liner and surrounding masonry

Why Your Chimney is so Important to Your Roof

Chimney leaks are one of the most common sources of roof-related water damage, but they are also often the most misdiagnosed. Your roof may be in great shape, but the connection points between it and the chimney may actually be to blame for the damage.

Brick Chimneys: Mortar and Masonry Concerns

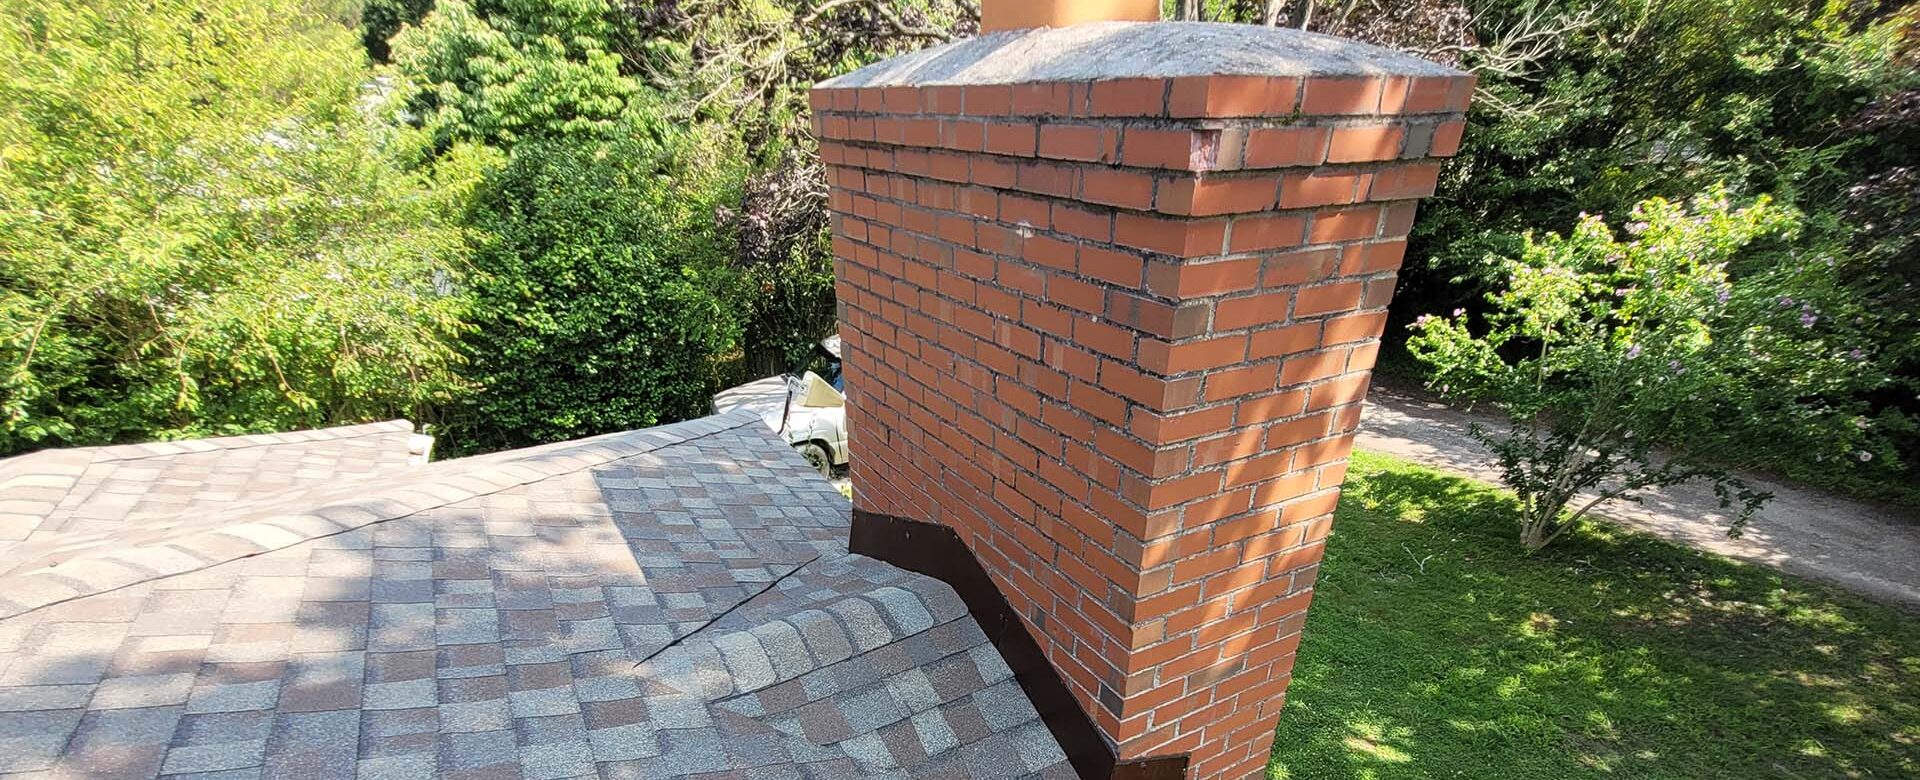
On brick chimneys, the most common leak source is deteriorating mortar – the material that holds the bricks together and seals the top crown of the chimney. Our coastal climate can be hard on masonry due to the summer heat, humidity and thaw-freeze cycles in the winter. That repeated expansion and contraction can eventually crack or erode mortar joints.

Once mortar begins to fail, water can get inside the masonry itself. Without remediation, bricks can literally pop off or become loose, causing significant structural deterioration and water intrusion into attic and living spaces. However, there are masonry specialists who can make these repairs, called “tuckpointing” which removes and replaces damaged mortar. Summer is the ideal time of year for this type of work for the mortar to dry quickly and effectively.

Vinyl-Sided Homes: Flashing Concerns

On homes with vinyl siding and vinyl sided chimneys, the critical element is flashing, that thin metal material installed around the base of the chimney where it meets the roof deck. When installed properly, step and counter flashing should create a watertight seal at this important transition point.

But flashing can fail for a number of reasons: poor original installation, sealant that has dried out and cracked over time, or physical damage from storms or settling. Because the failure point is often hidden under the siding or shingles, flashing leaks can be particularly tricky to diagnose and are often blamed on the roof itself when the chimney is actually the culprit.

Hampton Roads Humidity and Chimney Health

Hampton Roads’ coastal climate brings year-round moisture challenges that accelerate the wear on chimneys faster than drier inland climates. High humidity means mortar stays damp longer, sealants and caulks degrade more quickly, and any small opening in a cap, crown, or flashing becomes an invitation for ongoing water intrusion. That’s why staying ahead of chimney maintenance in our region is essential.

Check It Off Your List

At Andrews Roofing, we can inspect, and in some cases repair or replace chimney-related roofing components. From flashing to custom-fabricated chimney caps built to fit your specific chimney, we have the expertise to take care of it. If it’s been more than a year since your chimney was inspected, or if you’ve noticed any signs of water intrusion near the fireplace or in the attic above it, now is the time to act. Contact us today to schedule your chimney and roof inspection before summer flies by.

read more

DIY Roof Maintenance Tips Every Homeowner Should Know

Your roof is one of the most critical components of your home, protecting it from the elements day in and day out.

Regular maintenance can extend its lifespan and prevent costly repairs down the road. For serious roof repairs, a professional roofing contractor should be called in, as the work requires expertise and can be dangerous for a weekend DIYer. However, there are some essential roof maintenance tips that homeowners can do safely on their own to prevent damage and decay.

Make Inspections a Habit
Create a regular monthly or seasonal habit of visually inspecting your roof. You can time it with Easter, July 4th, Halloween and Christmas to make it easy to remember. Look for signs of damage such as missing or damaged shingles, cracked caulking, or rust spots on metal roofs. While we do not recommend tackling those repairs yourself, the earlier you identify them and get a professional involved, the less damage (and cost) you will incur.

Clean Gutters and Downspouts
Clogged gutters and downspouts can lead to water damage and roof leaks. Clear them of debris like leaves and branches to ensure proper drainage. This is especially important as fall winds down and again in the spring before summer storms begin. If you feel comfortable, you can use a ladder and gloves to remove the buildup manually, but always have someone nearby to steady the ladder and assist as needed. You may also want to invest in gutter guards for easier maintenance.

Trim Overhanging Branches
Overhanging branches from nearby trees on your property can scratch and damage your roof during windy conditions. Trim back any branches that come into contact with your roof to prevent this from happening. It will also reduce the risk of fallen branches causing severe damage during storms. If the branches or trees are very large, you don’t have the required tools or simply don’t feel comfortable tackling this yourself, call in a professional tree service, who can take care of it quickly and safely.

Check for Signs of Water Damage
Water stains on your ceiling or walls are clear indicators of a roof leak. If you notice any signs of water damage inside your home, inspect your roof immediately to identify the source of the leak. This can be done safely by inspecting your roof from your attic. Look for damp spots and moisture on the underside of the roof deck and even eroded insulation. Addressing leaks promptly can prevent mold growth and structural damage.

Repair Flashing
Flashing is the thin metal strips installed around roof penetrations such as chimneys, vents, and skylights to prevent water infiltration. Inspect the flashing for signs of damage or deterioration and repair or replace it as needed. Properly sealed flashing is essential for maintaining a watertight roof, and flashing damage is often the cause of a leak, rather than the roofing materials.

Andrews Roofing Can Help
Regular roof maintenance is essential for preserving the integrity of your home and avoiding costly repairs. By following these DIY roof maintenance tips, you can prolong the lifespan of your roof and ensure it continues to protect your home for years to come. Remember, safety should always be your top priority when working on your roof, so always take the necessary precautions and if a task ever feels like more than you can handle, contact Andrews Roofing. We handle all sizes of roof repairs as well as replacements. Our estimators can come out to your house and discuss the best approach to prolonging the life of your home’s roof.

read more

Shopping for a new house? Don’t forget to look up!

When potential home buyers are house shopping, they tend to focus on a home’s interior features, its location, neighborhood, and general curb appeal.

But one thing you should never overlook in a listing is a home’s roof. As an essential structural component of any home, a roof is one of the largest investments owners can make. In today’s cut-throat, competitive housing market, buyers are often willing to waive home inspections to have their offer considered over others. But this is never a good idea – buying a home without knowing about the condition of its roof is a risk that could cost you tens of thousands of dollars.

So, what should you look for as you leaf through those listings? Here are just a few considerations for prospective homebuyers when evaluating a property’s roof.

  1. Age: The age of a roof can tell you a lot and is perhaps the most important fact to know about it in advance. An older roof may be nearing the end of its lifespan and could require costly repairs or replacement soon. Look for signs of wear and tear such as missing or damaged shingles, sagging areas, or water stains on the ceiling. If the listing doesn’t say the roof’s age, have your real estate agent inquire about it.
  2. Material: Different roofing materials have varying lifespans, maintenance requirements, and durability. Most commonly in the Hampton Roads region you’ll see architectural asphalt shingles. But there are also metal roofs, clay tile, wood shake, and even synthetic recycled materials. Consider our local climate and what makes the most sense for your lifestyle and the home’s location when assessing roofing materials and whether you’re ready to take on their care.
  3. Leaks and Water Damage: Water damage can lead to extensive structural issues and mold growth. During a home inspection, carefully examine the interior ceilings, walls, and attic for any signs of water stains, mold, or mildew. Additionally, look for evidence of leaks around skylights, chimneys, vents, and flashings. All of these things can point to a roof that at best needs repairs and at worst needs to be completely replaced.
  4. Gutters and Drainage: Proper slope and drainage is essential for preventing water from pooling on a roof and causing damage – this is especially important in low slope or flat roofs. Likewise, gutters keep water from running off the roof and toward the foundation of a house, causing water damage that can affect a home’s overall structure. Inspect the gutters and downspouts for debris buildup, corrosion, or damage. Ensure that they are securely attached and effectively channel water away from the foundation of the house.
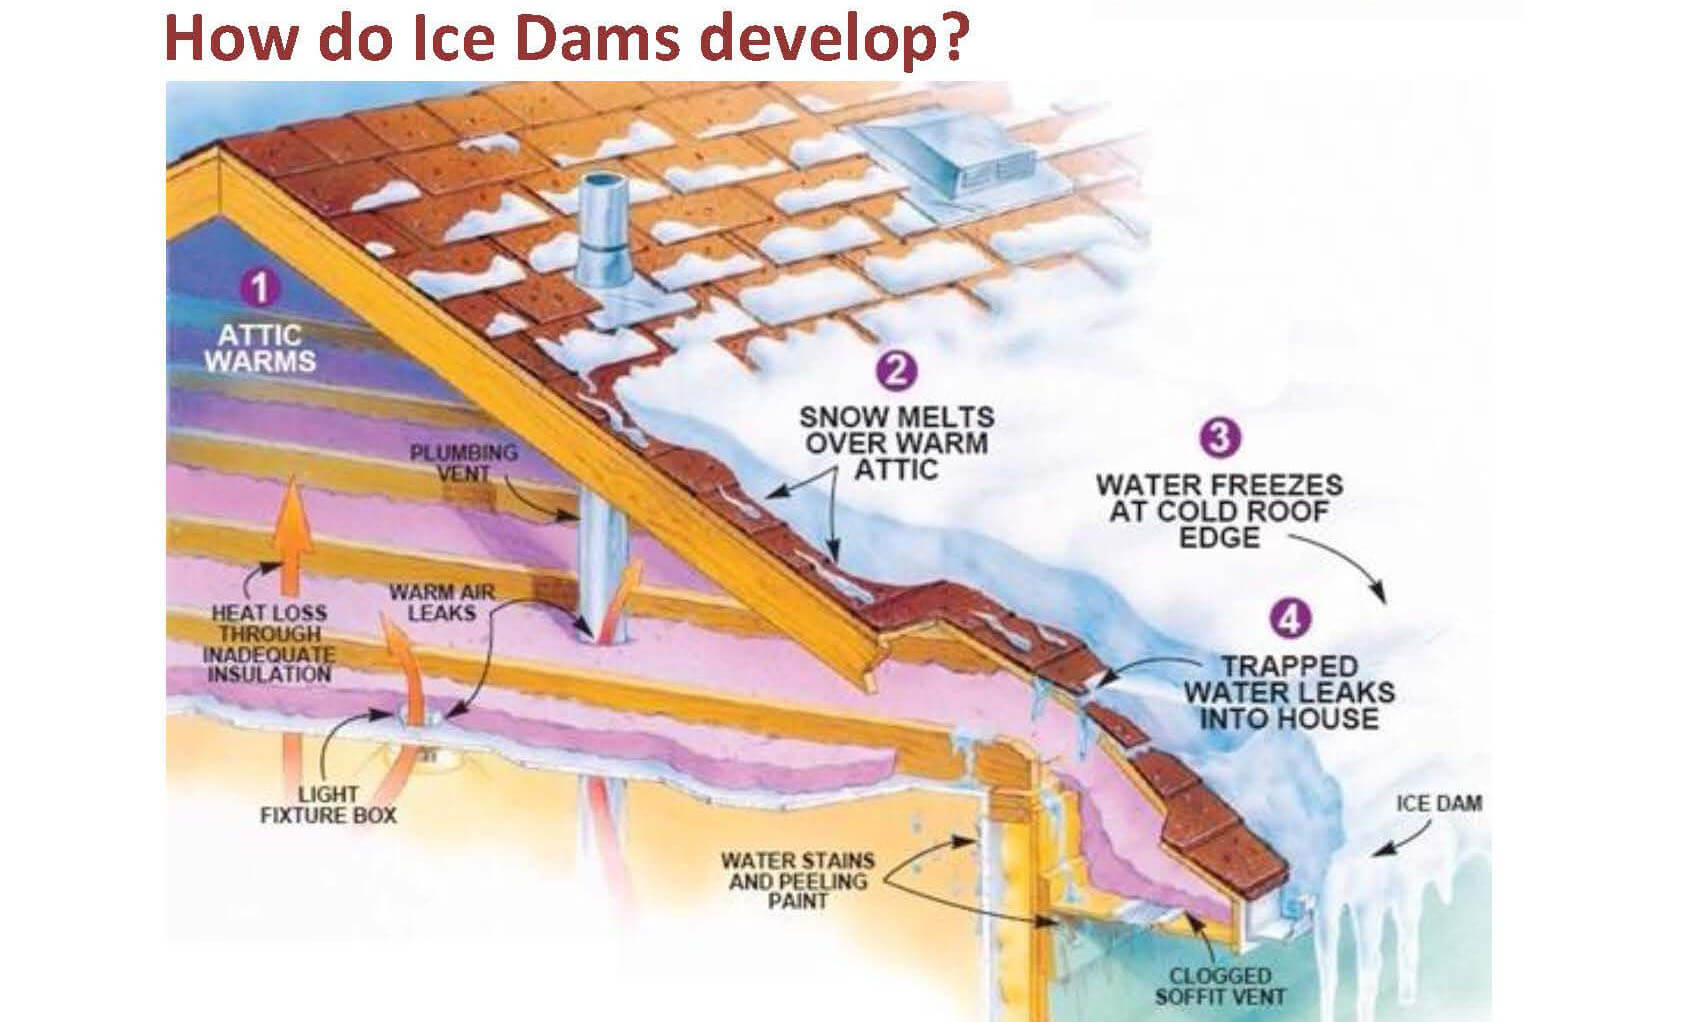
  5. Ventilation: Adequate attic ventilation helps regulate temperature and moisture levels, prolonging the lifespan of the roof and preventing issues like ice dams and mold growth. Check for vents along the eaves, ridge, and soffits, and ensure they are clear of obstructions. Improper ventilation can not only reduce the lifespan of a roof, but also dramatically increase your utility bills.
  6. Previous Repairs or Replacements: Inquire about any past roof repairs or replacements and obtain documentation if available. A well-maintained roof with a history of regular inspections and maintenance is sure to be in better condition than one that hasn’t. A roof that was recently replaced likely has material or workmanship warranties. Having the information about that is critical in case you need to make a future claim.
  7. Professional Inspection: While an initial visual assessment of the roof is something you can do yourself while touring a home, hiring a qualified roofing contractor or home inspector for a thorough evaluation is highly recommended. They can identify hidden issues, assess the overall condition of the roof, and provide insights into potential maintenance or repair costs. Don’t skip this step!

Andrews Roofing Can Help
If you’re in the process of purchasing a new home in the Tidewater area and you’d like a professional roof inspection done by a licensed roofing contractor, contact Andrews Roofing. We can give you the peace of mind that your investment is a solid one and keep you from financial heartache down the road.

read more

Winter Roof Prep

The temperatures are dropping, Christmas lights are popping up, and the days seem to end before they even begin – winter is here. That also means it’s a crucial time of year to prepare your home for the colder weather. Your roof may need some special attention in particular to ensure your home’s safety and comfort over the next few months since it’s the first line of defense against snow, ice, and those dropping temperatures. Here are a few handy tips for getting your roof winter ready.

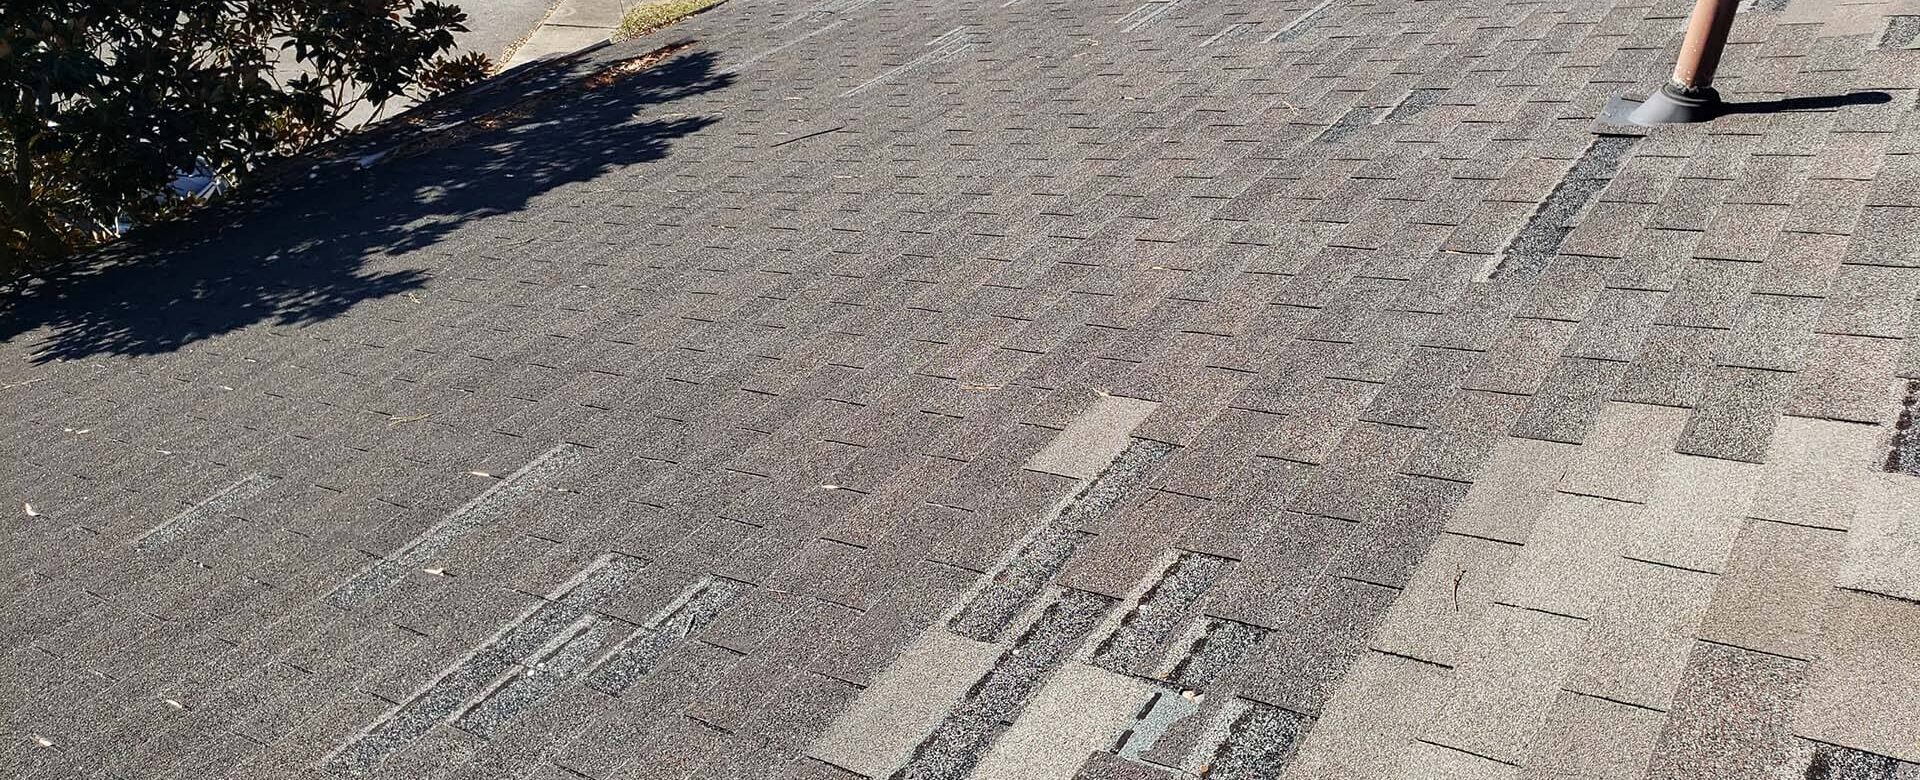
The first step is always to perform a visual inspection from both the outside and inside of your home. Look for damaged, loose or missing shingles, loose flashing, cracks around pipe collars or areas of moisture or drafts in your attic. Identifying these potential issues first is critical for how to move forward with your winter prep.

During your inspection, you should also check in on your gutters and downspouts. If they’re full from all those falling leaves, it’s time to give them a good cleaning. If gutters are clogged, a heavy rain followed by dropping temperatures can cause your gutters to produce an ice dam, which can cause serious damage to your roof, the gutters themselves and the interior of your home. You may also want to consider installing larger, high capacity gutters and/or gutter guards to prevent future build ups and issues.

Inside your home, inspect your attic carefully, as roofing issues are often easier to spot from this point of view. Damp areas may indicate a leak in the roof or condensation build up from lack of ventilation. Heavy air drafts can also point to punctures or damaged areas. While you’re there, take note of your attic’s insulation – if your home is older, it may be time to replace or add new insulation to keep your home’s temperature consistent, which reduces condensation and your heating and cooling costs.

If you have a wood burning fireplace and chimney, then hopefully you are having it inspected and cleaned at the beginning of the winter season as well. This is a good time to ask your chimney specialist to take note of the flashing around your chimney. Loose or missing flashing around a chimney can cause major structural damage over time, but avoiding this is an easy fix that’s far less expensive than the potential damage it could cause.

Although we don’t get snow very often here in Hampton Roads, when we do, any accumulation can put a strain on your roof. Roof rakes can be used to remove built up snow, which can be especially stubborn on the north side of your roof where the sunlight is less likely to melt it away.

The final winter prep tip isn’t about your roof, but your landscaping. Check the trees and vegetation around your home’s roofline. If there are any branches that are overhanging your roof, brushing up against your gutters or scraping at shingles, they will inevitably cause damage, especially when severe winter weather arrives. Trimming back trees, removing overhanging brush or vines can help prevent problems before they happen.

If you have any concerns about your roof’s winter weather readiness, contact Andrews Roofing today to schedule a roof inspection. One of our experienced roofing specialists can let you know if there are any issues that can be easily handled and repaired before extreme weather hits. Doing so will ensure your comfort and your peace of mind this season.

read more

Don’t Blame the Roof: Why Your Chimney May be the Cause of a Leak

Roof leaks are a homeowner’s nightmare, leading to potential damage, mold growth, and costly repairs. 

While many people associate roof leaks with damaged shingles or flashing, one often overlooked culprit is the chimney. Chimneys can be a source of significant water damage if not properly maintained. But how do you know whether your leak is coming from your roof or your chimney?

How Your Chimney Can Cause a Roof Leak:

  • Cracked or deteriorated chimney crown: The chimney crown is the concrete or cement layer at the top of the chimney. Over time, exposure to harsh weather conditions can cause it to crack or deteriorate, allowing water to seep into the masonry and eventually into the roof.
  • Damaged or missing chimney flashing: Flashing is the metal strip that seals the intersection between the chimney and the roof. If the flashing becomes damaged, improperly installed, or starts to deteriorate, it can create a pathway for water to enter the roof system.
  • Crumbling mortar joints: The mortar that holds the bricks or stones of the chimney together can deteriorate over time due to weathering. As the mortar crumbles, gaps and openings can form, permitting water infiltration into the roof.

How to Detect a Chimney-Related Roof Leak:

  • Internal signs: Look for water stains, peeling paint, or discoloration on ceilings or walls near the chimney. These are often indicators of a leak. Mold growth or musty odors may also be present.
  • Exterior signs: Inspect the chimney for cracks, crumbling masonry, or missing flashing. Pay attention to any signs of water pooling on the roof or around the chimney after a heavy rainfall.
  • Attic inspection: Check your attic for signs of water damage, such as damp insulation, water stains, or rotting wood near the chimney.

Taking Steps to Repair the Damage:

  • Consult a professional: If you suspect your chimney is causing a roof leak, it is crucial to contact a qualified roofing professional and/or chimney specialist. Depending on the damage you may need both specialists to come in and do repairs – especially if a chimney leak has caused damage to nearby areas of your roof.
  • Chimney crown repair: If the chimney crown is cracked or deteriorated, it should be repaired or replaced. A chimney professional can apply a waterproof sealant or construct a new crown to prevent water penetration.
  • Flashing replacement: Damaged or missing flashing should be replaced with new, properly installed flashing. This will ensure a secure seal between the chimney and the roof. A qualified roofing contractor can do this repair and in some cases a chimney repair company can as well.
  • Mortar joint repair: If the mortar joints are deteriorating, a process called tuckpointing can be performed. This involves removing the damaged mortar and replacing it with new mortar to restore the chimney’s integrity. This should only be done by an experienced chimney and masonry expert.
  • Regular maintenance: To prevent future leaks, schedule regular chimney inspections and maintenance. Keep the chimney free of debris, ensure proper ventilation, and consider applying a waterproofing sealant to protect against moisture.

While chimneys provide warmth and charm to our homes, they can also become a pesky source of roof leaks if neglected. Just like other functional and structural aspects of your home, pay attention to your chimney and visually inspect it regularly. If you think it may be causing any leaks or issues, contact a professional as soon as possible before further damage is done. By addressing chimney-related issues promptly, you can protect your home and preserve its structural integrity for years to come.

Andrews Roofing has been providing homeowners in Hampton Roads with sound roofing repair advice and services for over 25 years. If you’re not sure if your leak is coming from roof or chimney damage, contact us today. Our experts can provide an on-site inspection to help identify the issues and make a plan for repairs – whether we do them ourselves or refer you to a local chimney specialist.

read more